Category: Home and Garden

  • The Home Styling Touches Buyers Notice First

    The Home Styling Touches Buyers Notice First

    First impressions matter — especially in property. Whether someone is walking through the front door or scrolling through listings online, the initial impact of a well-styled home can be the decisive factor in capturing interest. For homeowners looking to sell, styling is no longer just a nice-to-have; it is a strategic asset that can influence both sale price and time on the market.

    In the highly competitive Australian property market, particularly in cities like Melbourne, thoughtful home styling isn’t about simply decorating — it’s about creating an emotional connection. Buyers want to imagine themselves living in a space, and the right visual cues can make that vision clear, compelling, and desirable. But what exactly are the styling touches that buyers notice first? Let’s explore the elements that matter most.


    Kerb Appeal and Entryways

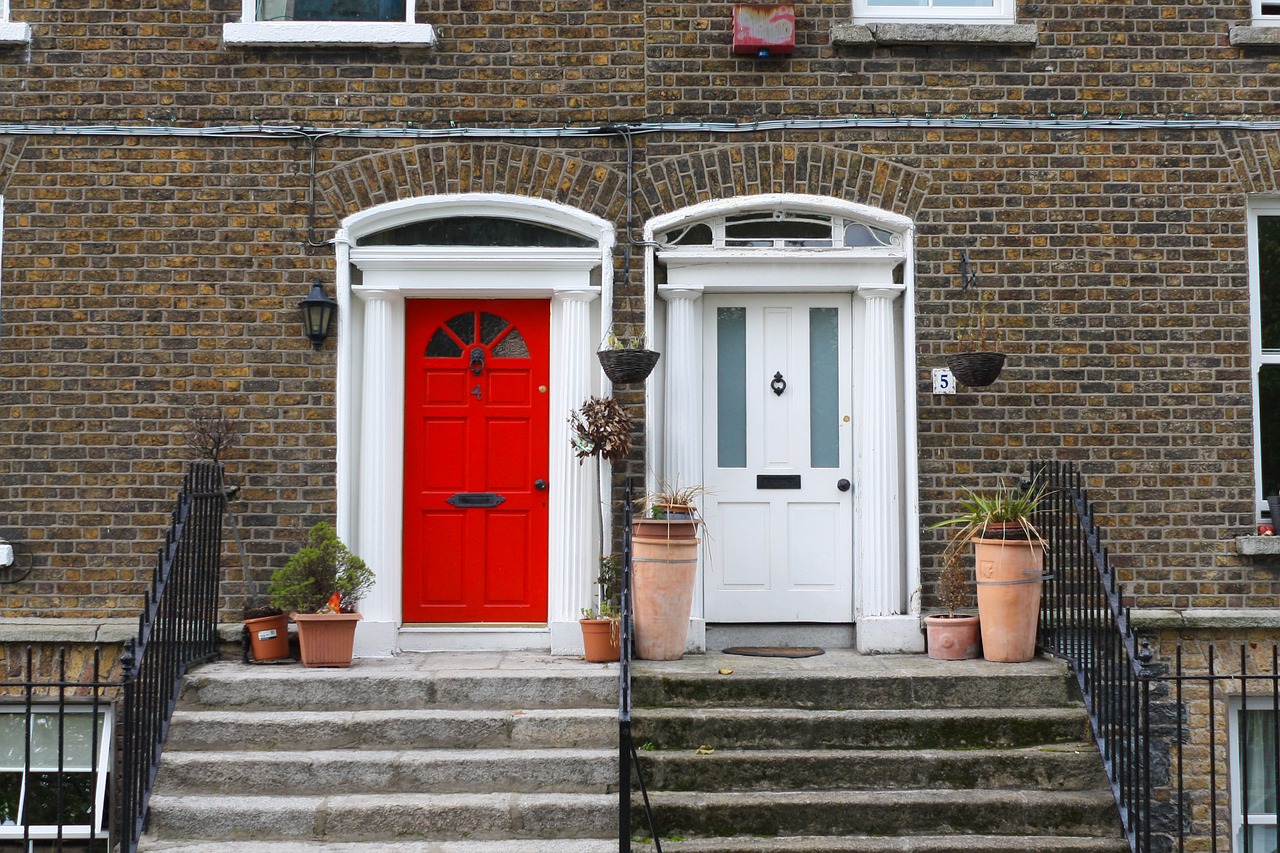
    It all starts on the street. A property’s kerb appeal — the attractiveness of a home’s exterior when viewed from the street — sets the tone for what’s inside. Well-maintained landscaping, fresh paint, clean windows, and a tidy path to the entrance make a striking first impression. For buyers, the entryway often reflects the care and attention given to the rest of the home.

    Inside, the foyer or entrance should immediately feel inviting. Decluttered spaces, tasteful lighting, and even a simple statement mirror or artwork can instantly signal style and sophistication. This initial moment frames the rest of the viewing experience.


    Cohesive Colour Palette

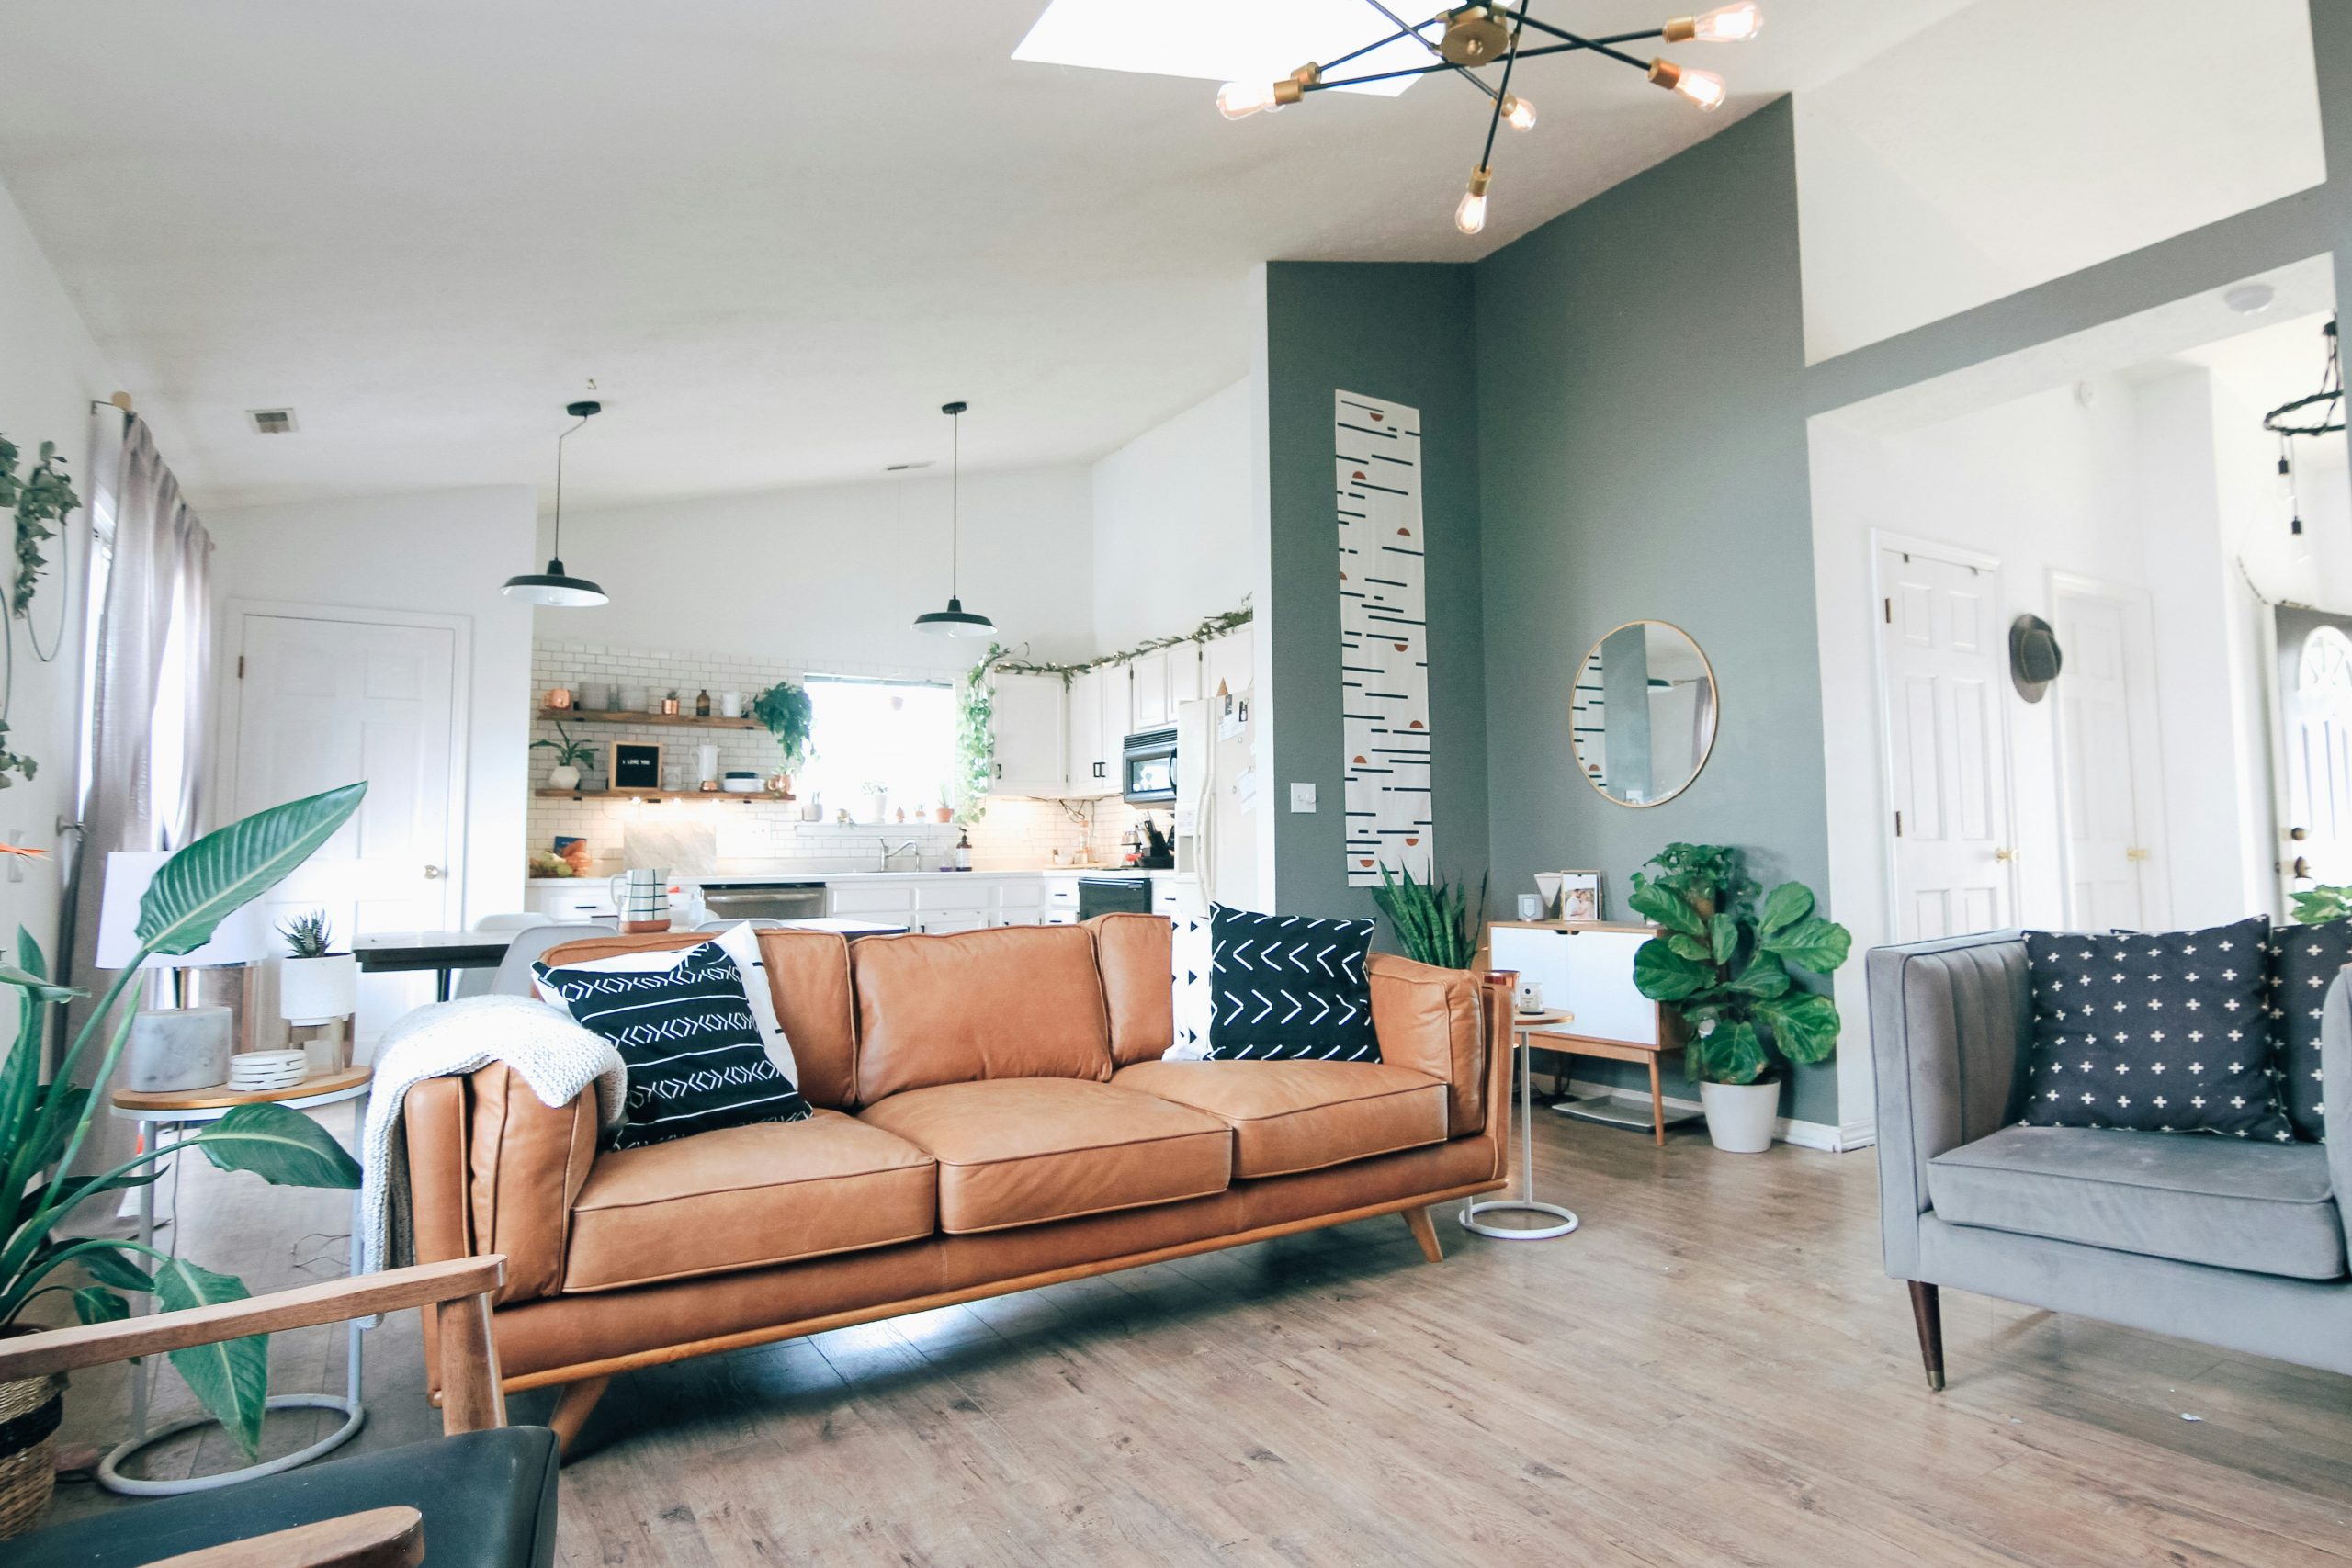
    One of the most subtle yet powerful styling touches is the use of a cohesive colour palette throughout the home. Buyers respond positively to spaces that feel harmonious. Using complementary tones across walls, soft furnishings, and décor helps create a consistent visual flow from room to room.

    Neutral tones such as soft greys, whites, and warm beiges are particularly effective, providing a blank canvas that allows buyers to mentally project their own lives into the space. Strategic use of accent colours can highlight architectural features or inject personality without overwhelming the senses.


    Furniture That Fits the Space

    Oversized or mismatched furniture can make even large rooms feel cramped or awkward. Home styling, when done right, uses appropriately scaled furniture to enhance room proportions and functionality. This helps buyers see the potential use of a space, whether it’s a cosy reading nook or a versatile dining area.

    Placement is just as important as size. Smart layout choices emphasise flow and openness, subtly guiding the buyer’s movement through the home and encouraging them to linger in each room.


    Lighting and Ambience

    Lighting dramatically influences mood and perception. Natural light is always preferred — clean windows, light curtains, and well-placed mirrors can help maximise it. However, artificial lighting also plays a key role.

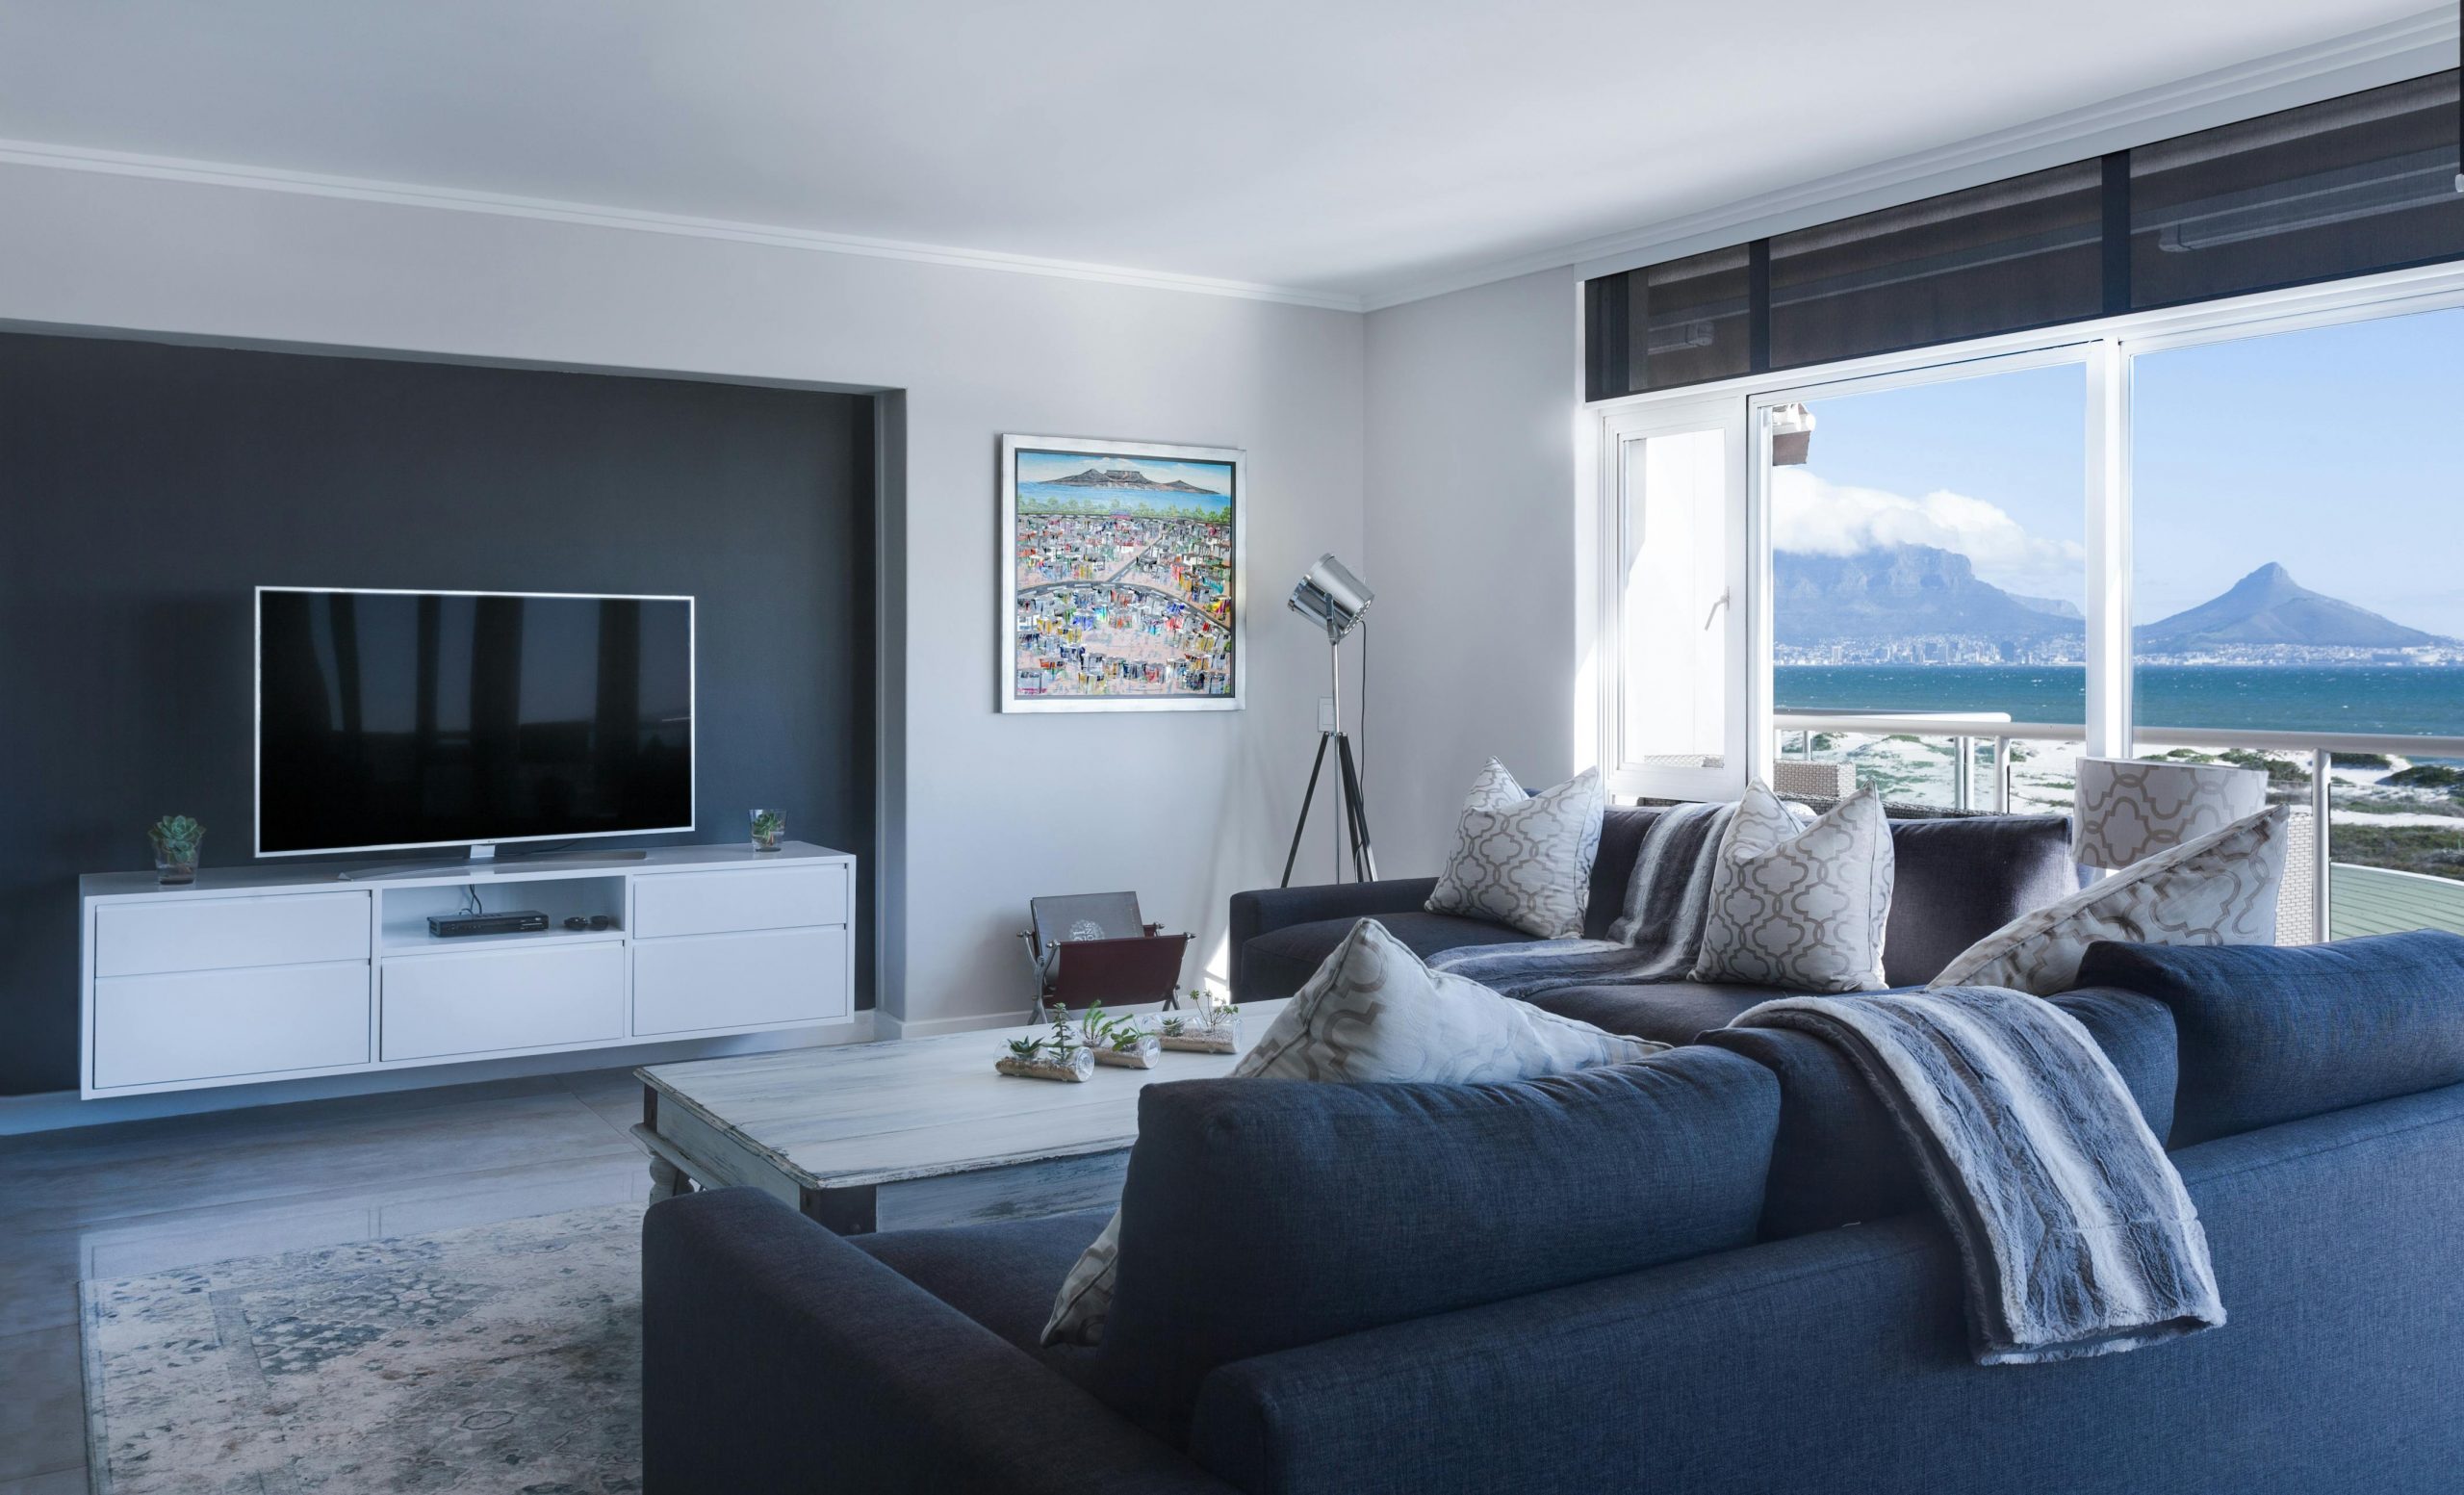
    Layered lighting schemes — a combination of ambient (general), task (functional), and accent (decorative) lighting — can elevate the perceived warmth and usability of a space. Dimmable lights, warm-toned bulbs, and stylish fixtures all contribute to creating a welcoming environment.


    Lifestyle-Oriented Décor

    Styling is not just about aesthetics — it’s about selling a lifestyle. Carefully chosen décor can suggest how each room could enhance everyday living. A set breakfast bar implies morning routines. A soft throw and books by a fireplace hint at winter relaxation. A well-dressed guest bedroom speaks to hospitality and comfort.

    Importantly, décor should be targeted but not overly specific. Buyers should feel inspired rather than distracted. The goal is to make rooms feel aspirational yet attainable.


    Decluttered and Depersonalised Spaces

    Buyers want to picture themselves in the home — not its current owners. Removing excessive personal items, bulky furniture, and general clutter helps create a clean slate. This also makes rooms appear larger and more usable.

    While completely sterile spaces can feel cold, a minimal yet curated approach strikes the right balance. Think of it as creating a lifestyle showroom: lived-in enough to feel real, styled enough to feel exceptional.


    Kitchens and Bathrooms: The Showstoppers

    Regardless of the overall layout, kitchens and bathrooms are often deal-makers. Styling these spaces should highlight their best features. In kitchens, this might mean clear benchtops, fresh fruit bowls, and updated cabinet handles. In bathrooms, fluffy towels, sleek dispensers, and greenery like a potted fern can transform the space from functional to spa-like.

    Even small touches — such as the scent of fresh linen or a soft diffuser aroma — can influence perception more than sellers realise.


    Professional Touches That Make the Difference

    Ultimately, while DIY styling can go a long way, many homeowners lack the time, experience, or eye for detail needed to achieve truly standout presentation. That’s where working with professionals can add considerable value. Experienced property stylists understand the psychology of buyers, market trends, and spatial design — and know exactly how to make a property shine.

    Many Melbourne homeowners, for instance, turn to trusted home staging services in Melbourne to ensure their homes are styled to meet buyer expectations while maximising sale outcomes. The expertise and tailored guidance provided can elevate a property’s appeal far beyond what most can accomplish alone.


    The Story Your Home Tells

    When selling a home, styling is about more than just looking good — it’s about telling a story buyers want to be part of. From the front garden to the final room, every styling decision contributes to that narrative. By focusing on the touches that buyers notice first, sellers can create not just a visually pleasing space, but an emotionally compelling one that invites offers and closes deals.


  • Designing Calm: How to Create a Home that Actually Helps You Unwind

    Designing Calm: How to Create a Home that Actually Helps You Unwind

    In a world that moves fast and rarely slows down, your home should be more than just a place to crash. It should be a sanctuary—a space that eases your mind, softens your mood, and makes it just a bit easier to breathe.

    But creating that kind of calm isn’t just about scented candles and soft cushions. It’s about designing your environment in a way that truly supports rest, clarity, and peace of mind. Here’s how to get started.


    Start With the Details that Ground You

    Calm begins at the surface. The way your home looks and feels on an everyday level sets the tone for how you experience it. Clean lines, gentle colours, natural textures—these are all subtle cues that tell your brain it’s safe to relax.

    And it’s not just the big items like sofas or wall paint that matter. Small, personal objects play a role too. Even your phone case can impact your space visually—whether it adds to clutter or blends with your aesthetic.

    Choosing accessories that feel intentional rather than chaotic helps reinforce that sense of calm.

    The key is to remove friction. The fewer jarring elements in your line of sight, the easier it is to let go of tension.


    Choose Colours that Soothe, Not Stimulate

    Colour impacts how we feel. While bright tones like red or orange can energise, softer hues tend to calm and quiet the mind. That’s why shades of blue, green, taupe, and pale grey are commonly used in calming interiors.

    You don’t need to repaint your entire house. Try introducing calming tones through textiles, bedding, or artwork. Muted palettes create a visual rhythm that slows you down without making the space feel flat.

    And if you’re unsure where to start, look to nature—forest greens, sandy beiges, and cloudy sky blues rarely go wrong.


    Use Texture to Create Warmth

    A calming space shouldn’t feel cold or clinical. Texture is what brings softness to a minimalist space and prevents it from becoming sterile. Think chunky knits, raw wood, linen curtains, or a thick wool rug underfoot.

    Layering different textures makes your home feel more tactile and grounded. It invites you to slow down and enjoy the moment. Just like slipping into your favourite jumper, these materials offer comfort without demanding your attention.

    If your space feels “off” even when it’s tidy, a lack of texture could be the missing piece.


    Make Room for Stillness

    Modern homes are often designed with function in mind: kitchens for cooking, offices for working, lounges for TV. But if you want your home to help you unwind, it also needs space that supports stillness.

    This doesn’t require a full meditation room. A cosy armchair by a window, a soft corner for journalling, or a clear coffee table for candles and books can offer gentle nudges to slow down.

    Designing for calm means building in pauses—physical areas that make it easy to stop, breathe, and do nothing at all.


    Keep Clutter to a Minimum

    Visual noise is real. When every surface is covered with stuff—papers, dishes, forgotten mugs, tangled cables—it becomes hard for your brain to switch off. That’s why reducing clutter is essential to designing a calming space.

    Focus on keeping surfaces clear and belongings easy to access but out of sight. Baskets, closed storage, and daily reset routines help create a visual sense of ease.

    It’s not about perfection. It’s about creating an environment that doesn’t constantly demand your attention.


    Design with All Five Senses in Mind

    While most interior advice focuses on how things look, calm is a full-body experience. Scent, sound, and touch all influence how relaxed we feel in a space.

    Introduce calming scents like lavender, chamomile, or sandalwood using diffusers or essential oils. Soothing background sounds—like soft playlists or gentle ambient noise—can help muffle stress. And the feeling of soft blankets, warm floors, or cool sheets can signal your body that it’s time to rest.

    When all five senses are in sync, your home begins to work with you—not against you.


    Let Calm Be Your Default

    The real magic of a calm home isn’t in any single design choice. It’s in the overall effect: a space that supports who you are when you’re not performing, working, or rushing.

    You don’t need a huge budget or professional designer. Just intention. A few quiet tweaks—some texture here, a shift in colour there, a little less clutter—can make a noticeable difference.

    Your home is a reflection of your inner world. When you give it space to breathe, you give yourself the same gift.


  • How to Safely Wire and Connect Your Lighted Mirror

    How to Safely Wire and Connect Your Lighted Mirror

    One of the most critical decisions when renovating or upgrading a bathroom is installing a lighted mirror bathroom. Besides adding elegance to your space, it will provide functional makeup, shaving, and skincare lighting. However, while the look and functionality of a lighted mirror bathroom can transform a space, careful attention is required in terms of installation, especially with wiring and connecting the electrical components of the said mirror.

    If you purchased a high-end lighted mirror for your bathroom,  electrical installation should be done appropriately while following all safety measures.

    In this article, we will walk you through the wiring and connections for a lighted mirror, keeping safety at every step in mind.


    Why Proper Wiring is Crucial

    Before diving into the how-to, let’s understand why proper wiring is essential for a lighted mirror bathroom. Incorrect installation can lead to several issues, including:

    • Electrical hazards: Loose or improperly connected wires can cause shorts, shocks, or fire hazards.
    • Poor functionality: If the wiring is incorrectly done, your lighted mirror may not function properly or fail prematurely.
    • Warranty issues: If the mirror is not installed according to manufacturer instructions, you may void your warranty.

    To avoid these risks, it’s crucial to approach the wiring process methodically. If you’re not experienced with electrical work, hiring a professional electrician is always a good idea. However, for those comfortable working with electrical components, this guide will provide step-by-step instructions on how to install your lighted mirror safely.


    Tools and Materials You’ll Need

    Before getting started, make sure you have the following tools and materials on hand:

    • Screwdriver (Flathead and Phillips)
    • Wire stripper and wire cutter
    • Voltage tester
    • Electrical tape
    • Wire nuts
    • Power drill (if needed for wall mounting)
    • Level
    • Circuit tester
    • Cable clamps
    • Drywall anchors (if required for your wall type)
    • Rubber gloves (for safety)

    Additionally, refer to your lighted mirror’s installation manual, as wiring details may vary slightly depending on the model.


    Step 1: Turn Off the Power

    Before starting any electrical work, switch off the power at the circuit breaker. This is the most important safety precaution to be taken to avoid shock and injury. Use a voltage tester to make sure there’s no power running to the area in which you will be working.

    When wiring your lighted mirror bathroom, it is crucial to work on a de-energized circuit. If you are not sure which breaker controls the bathroom circuit, as a precautionary measure, switch off the main power supply to the whole house.


    Step 2: Plan the Location and Wiring Path

    Next, plan where you’ll install the mirror and how you’ll run the electrical wiring. If your lighted mirror bathroom is designed to be wired directly into the electrical system, you’ll need to locate the junction box and ensure there is a safe path for running wires from the power source to the mirror.

    Key considerations

    • Location: Choose a location for the mirror where it will provide optimal lighting. Typically, a lighted mirror is mounted above or near the bathroom vanity.
    • Existing Wiring: Check if there’s existing wiring or if you need to run new wiring. You may need to cut a hole in the wall to access the power lines and install the junction box, so make sure you are working in a safe area.
    • GFCI Outlet: If the mirror is plugged into an outlet, make sure that the outlet is connected to a GFCI (Ground Fault Circuit Interrupter). GFCIs are required for bathrooms due to the risk of electrical shocks from moisture.


    Step 3: Mount the Junction Box (If Required)

    If your lighted mirror requires direct wiring, you may need to install a junction box. This box serves as the point where electrical wires are safely connected to the mirror.


    Instructions

    1. Cut the hole in the drywall (if needed) where you want the junction box to be placed. Ensure it is level and centered at the right height for your mirror.
    2. Install the junction box securely by anchoring it into the wall studs.
    3. Run the electrical cable from the power source to the junction box, ensuring you leave enough slack to make proper connections.

    Important tip

    Always use UL-listed junction boxes and follow the manufacturer’s instructions on the size and type of box required for your mirror installation.


    Step 4: Wire the Lighted Mirror

    Once the junction box is in place, it’s time to wire the lighted mirror to the electrical supply. Depending on your mirror, this could involve either a direct hardwired connection or simply plugging it into a GFCI outlet.

    Hardwiring Your Lighted Mirror

    If you are wiring the mirror directly to the electrical supply, follow these steps:

    Prepare the wires: Use a wire stripper to remove about 1/2 inch of insulation from each wire.

    Connect the wires: The standard electrical wiring color coding is:

      • Black (Hot): This wire carries the current.
      • White (Neutral): This wire completes the circuit.
      • Green or Bare (Ground): This wire prevents electrical shocks by grounding the circuit.

    Match and twist the corresponding wires together: black to black, white to white, and green or bare to the ground wire. Use wire nuts to secure each connection.

    Secure the wires: After twisting the wires together, use electrical tape to further secure the connections. Make sure no exposed copper wire is visible.

    Attach the mirror’s wiring: Connect the mirror’s wiring to the junction box’s electrical supply wires. Again, black to black, white to white, and ground to ground. Depending on your mirror’s design, the wiring will either be attached via screw terminals or push-in connectors.


    Using an Outlet for Plug-In Mirrors

    If your model lighted mirror is the plug type, simply plug it into a GFCI bathroom outlet. Be sure the outlet is properly grounded and in operation before connecting the mirror. Test the outlet with a circuit tester to ensure that it is functioning properly.


    Step 5: Mount the Mirror

    Once the wiring is securely connected, it’s time to mount your lighted mirror on the wall. Here’s how to do it:

    1. Locate the wall studs: Use a stud finder to find the studs behind the drywall. Mark the locations where the mirror will be anchored.
    2. Install mounting brackets: If your mirror has a mounting bracket, follow the manufacturer’s instructions for attaching it to the wall.
    3. Hang the mirror: Once the brackets are securely in place, carefully lift the mirror and hang it on the mounting hardware.
    4. Ensure the mirror is level: Use a level to make sure the mirror is perfectly straight.


    Step 6: Test the Mirror

    Now that the wiring is complete and the mirror is securely mounted, it’s time to test it.

    1. Turn on the power at the circuit breaker.
    2. Test the mirror by flipping the switch or pressing the power button. The mirror should light up and illuminate the bathroom.
    3. Check for any issues: If the lights flicker, the mirror doesn’t turn on, or there’s an issue with the wiring, turn off the power and double-check your connections.


    Step 7: Final Safety Check

    Before calling it a day, conduct a final safety check:

    • Verify that the electrical connections are secure and insulated.
    • Ensure the mirror is properly mounted and stable.
    • Confirm that the mirror is operating correctly with the lighting and any additional features (e.g., anti-fog, dimming).

    If you’re not confident in the wiring or connections, it’s always best to consult a licensed electrician. Even though installing a lighted mirror bathroom can be a DIY task, electrical work requires attention to detail and strict adherence to safety standards.


    Takeaway

    Installing a lighted mirror in your bathroom can significantly enhance the look and functionality of your space.

    With proper planning and attention to detail, wiring and connecting your lighted mirror can be a straightforward process. However, always prioritize safety and follow manufacturer guidelines to ensure a successful and safe installation.

    Whether you’re upgrading your bathroom for personal use or remodelling for resale value, a lighted mirror bathroom is an investment that combines beauty with practical functionality. By following the steps outlined in this guide, you can safely wire and connect your mirror, bringing an elegant, illuminated touch to your home.


    bathroom


  • How to Keep Your Smart Washing Machine Running Like New

    How to Keep Your Smart Washing Machine Running Like New

    Smart washing machines are the next step in the evolution of laundry, and they have tons of cool features that make them a great buy. You can control them by using any internet enabled mobile device from wherever you are. They can also do cool things like dispensing bleach and detergent automatically from a reservoir. But they are expensive pieces of machinery, and properly taking care of them becomes even more important. Not to mention that repair costs tend to be more expensive on these machines as well.

    Let’s take a look at a few simple maintenance tips anyone can apply to keep their new smart machine running and looking like new.


    Wash it Often and Wash it Right

    Smart washing machines can also get dirty, and can sometimes form residues. This is especially the case when it comes to greasy clothes. So, you’ll have to make sure that you remove any type of dirt and slime from the dispenser, water pipes, and tub. If you want to learn exactly how to do this, check this article that Service Force published on how to clean your washing machine properly. Their simple 5 step guide will teach you exactly everything you need to know about cleaning your washing machine. They also show you tips on how to remove limescale deposits and how to clean top loading machines.


    Choose the Right Cycle

    Another common mistake people make when using their smart machines is always using the same setting for all clothes. But always using the same cycles could end up overworking the machine. So, use gentle cycles for delicates and clothes that are not heavily soiled. Only use strong settings for tough stains or clothes that are very greasy.


    Make Sure that the Machine is Always Levelled

    You also have to make sure that the surface under the machine is properly levelled. If a machine is off its kilter, there will be some issues during the spin cycle and it might start rocking or moving. This could not only cause damage to your floor, but to the machine as well.


    Protect Your Investment

    Buying a smart washing machine is a significant investment, and while regular maintenance is key to longevity, unexpected issues can still arise. That’s why it’s important to think about how you’ll handle potential repairs or breakdowns in the long run. To make sure you’re covered when things go wrong, consider checking what kind of protection is available through a washing machine warranty. It could save you from costly surprises and help ensure your machine gets the service it needs when it matters most.


    Use the Right Detergent

    Most smart machines are highly efficient machines, and you have to make sure that you use detergent made especially for them if you want to keep it in tip top shape. The issue with regular detergents is that they have a tendency to create excessive suds, which ends up forming a film on the machine’s hoses and drum. This in turn will become a perfect environment for mould to start growing and could even end up electronically or mechanically damaging your machine.

    So, make sure that you read labels carefully when picking detergent. Also know that some detergents, though they might be labelled for HE machines, may still produce too many suds, so check how it behaves in your machine. And not only that, but in some cases, using the wrong type of detergent in your machine could end up voiding your warranty, so be careful.


    Make Sure That You Let It Breathe

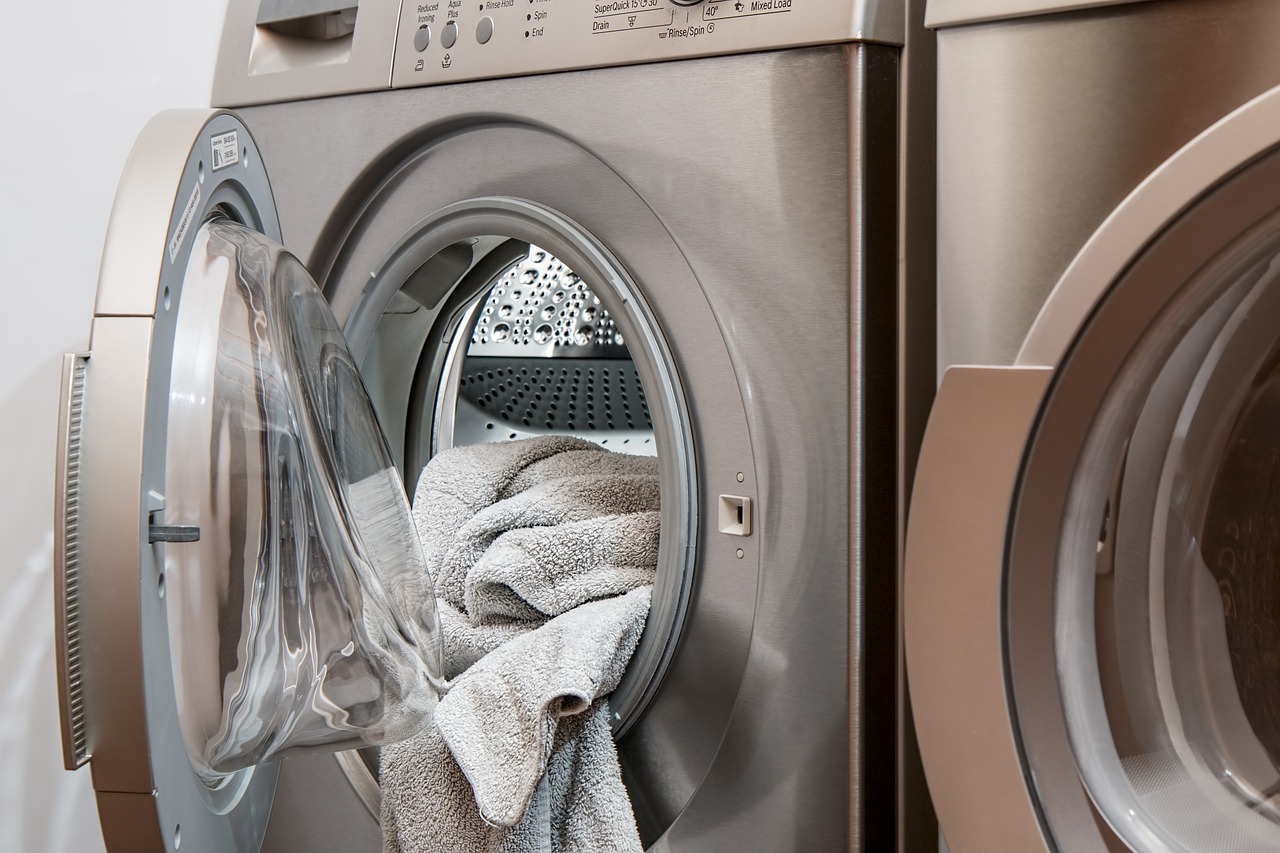
    When not using the machine, it’s always better to keep the door open. Not only will it help keep the interior smelling fresh, but mould and other organisms love humidity, so you’ll reduce the chance of them growing if you keep the interior as dry as possible.

    Smart washing machines do not come cheap, so it’s important that you give them the proper care if you want to reduce the chances of breakdown and extend their lifespan. These few tips will not only allow you to do that, but they could actually save you from inadvertently invalidating your warranty as well.


  • The Hidden Dangers of Neglecting Your Septic Tank: What Every Homeowner Should Know

    The Hidden Dangers of Neglecting Your Septic Tank: What Every Homeowner Should Know

    For many rural and suburban homes across the UK, septic tanks are not just a convenience—they are a necessity. In areas where properties are not connected to the mains sewer network, septic systems provide an effective and environmentally responsible way to manage household wastewater. These underground tanks are designed to collect, treat, and safely dispose of sewage, making them an essential component of a property’s sanitation infrastructure. When issues arise, services such as emergency septic tank emptying may be required to prevent serious damage and health risks.

    Unlike properties with access to a centralised sewage treatment plant, homeowners with septic tanks bear full responsibility for the ongoing operation and maintenance of their system. When properly maintained, a septic tank can function efficiently for decades. However, neglecting regular inspections, emptying, or general upkeep can lead to serious consequences—not just for the property, but also for the surrounding environment and public health.

    This article explores the hidden dangers of ignoring your septic tank and outlines the steps homeowners should take to avoid costly, and potentially hazardous, outcomes. For those seeking expert assistance, DrainBoss provides professional septic tank services tailored to both domestic and commercial needs, including routine and emergency support across the South East.


    How Septic Systems Work

    A septic system is a self-contained underground wastewater treatment solution, commonly used in properties without access to mains drainage. While the concept may seem straightforward, the system itself comprises several crucial components that must work in harmony to ensure effective and safe wastewater management.

    The key components of a septic system include:

    • The Septic Tank: This is the primary chamber where wastewater from toilets, sinks, showers, and appliances flows. The tank allows solids to settle at the bottom as sludge, while oils and grease float to the top, forming a scum layer. The relatively clear liquid in the middle, known as effluent, exits the tank for further treatment.
    • The Distribution Box: Once the effluent leaves the septic tank, it flows into the distribution box. This component ensures that the liquid is evenly distributed into the next stage—typically the drain field.
    • The Drain Field (or Soakaway): This is a network of perforated pipes laid in gravel-filled trenches. The effluent slowly trickles out of the pipes into the surrounding soil, where it is naturally filtered and broken down by microbes.

    The process relies on gravity and bacterial activity to break down waste and remove harmful pathogens. However, this delicate system depends on one critical factor: balance.

    If too much water enters the system at once—through heavy usage or poor drainage management—it can overwhelm the tank and drain field. This disrupts the separation process, increases the risk of backups, and reduces the effectiveness of filtration. On the other hand, if solids are allowed to build up over time without being removed, they can clog pipes and infiltrate the drain field, leading to total system failure.

    Maintaining the right balance between the amount of incoming wastewater and the system’s treatment capacity is essential. This is why regular monitoring, pumping, and care are not optional—they are integral to keeping your septic system functioning safely and efficiently.

    What Happens When Maintenance Is Ignored

    When septic tank maintenance is neglected, the consequences can escalate quickly—affecting everything from household plumbing to property value and the local environment. Below is a breakdown of the most common problems and the risks they carry:

    Issue Description Potential Consequences
    Overflow & Backups Build-up of sludge and scum can block the outlet pipe, causing untreated wastewater to back up into the home or garden. Flooded toilets and sinks, foul-smelling pooling water, raw sewage in the home, health risks.
    Drainfield Failure Solids entering the drainfield clog the soil and pipes, halting proper filtration and water absorption. Saturated soil, strong odours, expensive excavation, full system replacement.
    Groundwater Contamination Leaks or overflows can release bacteria, viruses, and nitrates into soil and groundwater. Pollution of drinking water, environmental harm, health hazards for humans and animals.
    Structural Damage Cracks in the tank or failing pipe joints caused by age, pressure, or poor maintenance. Inefficient waste processing, system leaks, erosion, costly repairs or full tank replacement.
    Persistent Odours Hydrogen sulphide and other gases build up due to decomposing waste and poor ventilation. Unpleasant smells indoors and outdoors, reduced quality of life, indication of system nearing failure.


    Neglecting even minor maintenance can lead to major, expensive issues down the line. Understanding these warning signs and their potential impact is the first step toward prevention and protecting your property.


    Risks to Health and Safety

    Neglecting septic tank maintenance doesn’t just pose a threat to your property—it can also have serious consequences for your health and the wellbeing of those around you. When a septic system fails, it can release harmful substances and pathogens into the environment, creating multiple avenues for exposure. These risks are often invisible at first but can escalate quickly if left unaddressed.

    Spread of Bacteria, Viruses, and Parasites

    Untreated or poorly treated wastewater can contain a wide range of harmful microorganisms, including E. coli, Salmonella, Hepatitis A, and Giardia. When these pathogens make their way into surface water, groundwater, or soil, they can pose a significant risk to both human and animal health. Direct or indirect contact—such as through contaminated drinking water or recreational water use—can lead to gastrointestinal illnesses, infections, and in severe cases, long-term health complications.

    Respiratory Issues from Toxic Gases

    As organic waste decomposes in a poorly maintained septic tank, it produces gases such as methane and hydrogen sulphide. Methane, although odourless, is highly flammable and dangerous in enclosed spaces. Hydrogen sulphide, on the other hand, has a distinctive “rotten egg” smell and can cause respiratory irritation, dizziness, headaches, and nausea, particularly with prolonged exposure. In high concentrations, it can be life-threatening.

    Skin Irritations and Allergic Reactions

    Physical contact with contaminated water—whether during a backup, surface overflow, or gardening in affected soil—can lead to skin rashes, irritations, or more serious infections. Individuals with sensitive skin or existing allergies are particularly vulnerable to developing adverse reactions from exposure to the harmful chemicals and pathogens present in sewage.

    Indoor Air Quality Concerns

    When gases from a failing septic system seep indoors, they can contribute to poor air quality within the home. Even in small amounts, these gases may trigger respiratory issues, especially in vulnerable groups such as children, the elderly, and those with asthma or other respiratory conditions. Over time, consistent low-level exposure can worsen chronic conditions or lead to the development of new health issues.

    Maintaining a septic system isn’t just about preventing inconvenience—it’s a critical step in protecting public health. Ensuring your system is regularly inspected and emptied helps eliminate the conditions in which these hazards can develop, creating a safer environment both inside and outside your home.


    Environmental Consequences

    A neglected septic system doesn’t just pose a risk to your property—it can have a serious and lasting impact on the environment. When untreated or poorly treated wastewater escapes into the surrounding area, it introduces harmful pollutants into natural ecosystems.

    One major concern is the contamination of rivers, streams, and groundwater. Wastewater can carry bacteria, viruses, and chemicals that threaten both human and animal health. In areas that rely on well water or surface water, this contamination can have particularly serious consequences.

    Another effect is eutrophication, caused by excessive nutrients like nitrogen and phosphorus in the wastewater. These nutrients fuel rapid algae growth in ponds and lakes, which depletes oxygen levels and leads to the death of fish and other aquatic life.

    Over time, these pollutants can also harm local flora and fauna, disrupting habitats and reducing biodiversity. In some cases, toxic substances may enter the food chain through a process known as bioaccumulation, posing long-term health risks to animals and humans alike.

    Protecting the environment begins with responsible septic care. Regular maintenance helps prevent these issues and supports a healthier, more sustainable ecosystem.


    Financial and Legal Repercussions

    Neglecting your septic tank doesn’t just carry environmental and health risks—it can also hit your wallet hard and lead to potential legal trouble. What may seem like a cost-saving decision to skip routine maintenance can quickly spiral into a far more expensive and complex problem.

    Emergency repairs and drainfield restoration are among the most costly consequences of neglect. If a system backs up or the soakaway becomes saturated and fails, excavation and replacement may be the only solution. These interventions can cost thousands of pounds and cause major disruption to your home and garden.

    There’s also the issue of property value. A home with a poorly maintained or failing septic system is far less appealing to buyers. Potential purchasers may be deterred by the prospect of repairs or may negotiate significantly lower offers. In some cases, the property may even be deemed unsellable until the system is brought up to standard.

    From a legal standpoint, homeowners are responsible for ensuring their septic systems comply with local environmental and public health regulations. A malfunctioning system can result in fines or enforcement action—particularly if it causes pollution or poses a risk to others. Local councils or environmental agencies may require immediate corrective work, adding further to the financial burden.

    Finally, selling a property without a proper record of septic maintenance can create delays or complications during the conveyancing process. Solicitors and surveyors increasingly request documentation to confirm compliance, and lack of evidence can stall or even jeopardise a sale.

    Investing in regular septic care is not just about preventing inconvenience—it’s a safeguard against unexpected costs, legal issues, and loss of property value.

    How to Prevent These Problems

    The good news is that the majority of septic system issues are entirely preventable with a little foresight and routine care. By staying on top of maintenance, homeowners can avoid the costly and hazardous consequences discussed earlier.

    Follow a regular service schedule.
    Most experts recommend that septic tanks be professionally inspected and emptied every three to five years, depending on the size of the tank and the household’s water usage. Larger families or properties with smaller tanks may require more frequent servicing. Keeping a written record of maintenance dates can help you stay on track and demonstrate compliance if needed.

    Watch for early warning signs.
    There are several tell-tale indicators that your system may need attention. Slow drains, gurgling pipes, bad odours indoors or outdoors, standing water near the drainfield, and unusually lush grass over the soakaway area can all signal that the tank is full or that a blockage is developing. Addressing these signs promptly can prevent more serious problems from occurring.

    Use qualified professionals.
    While it may be tempting to attempt DIY fixes, septic systems are complex and require specialist knowledge and equipment to service safely and effectively. Licensed professionals not only ensure the job is done properly, but they can also spot emerging issues early and provide guidance on keeping your system in optimal condition. Additionally, using a certified service provider helps ensure compliance with environmental regulations.

    Taking a proactive approach to septic tank care is a smart investment in your home, your health, and the environment. A little maintenance goes a long way in preventing avoidable headaches down the line.


    Conclusion

    Neglecting your septic system may seem harmless in the short term, but as we’ve explored, the long-term consequences can be severe—from health hazards and environmental pollution to property damage, financial strain, and legal complications. Regular maintenance is the key to preventing these issues before they escalate. By staying on top of inspections and emptying schedules, homeowners can protect their families, their investment, and the natural environment around them.

    For those seeking a reliable, professional solution, DrainBoss Plumbing & Drainage offers a fully comprehensive septic tank emptying and maintenance service for both residential and commercial properties. With experienced engineers, modern vacuum tankers, and a reputation built on service excellence, DrainBoss ensures your system is not only emptied, but properly cared for. Whether you require a one-off visit or a regular maintenance plan, their tailored approach helps keep your septic system running safely and efficiently.

  • Modular Bathrooms: A Smart Solution for Modern Construction Challenges

    Modular Bathrooms: A Smart Solution for Modern Construction Challenges

    Modular bathrooms are revolutionizing the construction industry, offering a compelling solution to many challenges faced in modern building projects. Forget the traditional, time-consuming methods – prefabricated bathroom pods are changing the game. Let’s explore how these innovative solutions are streamlining construction, improving quality, and even contributing to a more sustainable future.

    Key Benefits of Modular Bathrooms for Large-Scale Projects: A First-Hand Perspective

    From my experience, modular bathrooms bring a whole host of advantages to large-scale construction. Here’s a breakdown of why they’re such a game-changer:


    Speed of Installation: Shaving Weeks Off Your Project Timeline

    One of the most immediate benefits I’ve seen is the drastic reduction in installation time. Because the bathrooms are built off-site in a controlled environment, they arrive practically ready to plug and play. This means less time spent on-site, translating directly to faster project completion. I’ve personally witnessed projects where modular bathrooms shaved weeks off the original timeline. Consider, for example, a hotel project in downtown Chicago where using modular bathrooms allowed us to open three weeks ahead of schedule, directly impacting revenue generation.

    Cost Control: Predictability and Reduced Expenses

    Budget overruns are a common headache in construction. With modular bathrooms, you gain much better cost control. Factory production allows for precise management of materials, minimizing waste. Plus, because the process is standardized, there are fewer errors and less rework, leading to significant cost savings. Fewer on-site workers also mean reduced labor expenses. According to a report by McKinsey, modular construction can reduce costs by as much as 20% compared to traditional methods. Additionally, the decrease in on-site personnel significantly lowers the risk of workplace accidents, further contributing to cost savings by reducing potential insurance claims and liabilities.

    Quality Consistency: Uniform Excellence Across Every Unit

    In traditional construction, you’re often relying on the skill and consistency of individual tradespeople. Modular bathrooms, however, are manufactured under strict, controlled conditions. This ensures that every single unit meets the same high standards. I’ve seen firsthand how this consistency reduces defects and eliminates the need for costly on-site fixes. Each pod undergoes rigorous quality control tests, including pressure and leak tests, before leaving the factory, significantly minimizing the chance of defects reaching the construction site.

    Logistical Efficiency: Streamlining the Construction Site

    The logistics of a construction site can be a nightmare. Transporting fully assembled modules directly to the site simplifies the entire process and minimizes on-site clutter. This streamlined approach allows for better coordination with other construction activities. The reduction in on-site materials and waste also contributes to a cleaner and safer working environment. I’ve found this particularly beneficial for large-scale projects like hotels and apartment complexes, where maintaining a structured workflow is crucial. A key advantage often overlooked is the reduction of on-site disruption. By minimizing the need for extensive on-site construction, modular bathrooms help to keep noise and dust levels down, which is especially important in urban environments or near sensitive locations like hospitals or schools.

    Sustainability: Building Green with Modular Solutions

    Sustainability is no longer a niche concern; it’s a necessity. Modular bathrooms contribute to sustainability efforts by optimizing resource use during factory production. This leads to reduced material waste and energy consumption. Many manufacturers, like the ones discussed on domczar.co.uk, are even incorporating eco-friendly materials and water-saving fixtures into their designs. This makes modular bathrooms an excellent choice for developers looking to minimize their environmental impact. Moreover, the precision of factory construction reduces material waste by up to 30% compared to traditional on-site building methods, according to the Modular Building Institute. Prefabrication also allows for better insulation and airtightness, contributing to long-term energy savings for the building.


    How to Choose the Right Modular Bathroom for Your Investment: A Practical Guide

    Choosing the right modular bathroom is an important decision. Here’s a step-by-step guide based on my experiences:

    Step 1: Evaluate Your Space

    Carefully measure the available space and determine the exact dimensions needed. Modular units come in various sizes and layouts, so precise measurements are essential for a seamless fit. Consider the placement of doors, windows, and existing plumbing to ensure optimal utilization of the space. Don’t just measure the floor space; also consider ceiling height and any obstructions that might impact the installation process.

    Step 2: Material Selection

    Opt for high-quality, durable materials that can withstand moisture and heavy use. Stainless steel, reinforced concrete, and composite panels are excellent choices. Don’t skimp on materials; investing in quality upfront will save you money on repairs and replacements down the line. Look for materials with appropriate certifications for moisture resistance and fire safety.

    Step 3: Functionality and Customization

    Think about the specific needs of your project. Do you need accessible bathrooms? Are you looking for luxury features like heated floors or rainfall showers? Modular bathrooms can be customized to accommodate a wide range of requirements. Consider features like grab bars, adjustable shower heads, and easy-to-reach controls for accessibility.

    Step 4: Compliance and Regulations

    Ensure that the modular bathrooms comply with all local building codes and regulations. This is crucial to avoid legal issues and costly rework. Work with a reputable manufacturer who understands local regulations and can ensure compliance. Ask for documentation and certifications that prove compliance with relevant building codes, including plumbing, electrical, and accessibility standards.

    Step 5: Cost and Long-Term Maintenance

    While the initial cost of modular bathrooms may be higher than traditional construction, factor in the long-term savings. Consider reduced labor costs, faster project completion, and lower maintenance expenses. Choose a provider with a proven track record of quality and reliable customer support. In addition to the initial cost, inquire about the warranty offered by the manufacturer and the availability of replacement parts. Understanding the long-term maintenance requirements and associated costs is crucial for making an informed decision.

    Step 6: Evaluate Supplier Support and After-Sales Service

    The choice of supplier is critical. Select a manufacturer with a proven track record, positive customer reviews, and comprehensive after-sales support. A reliable supplier will offer assistance with installation, maintenance, and any potential issues that may arise. Ensure the supplier provides detailed documentation, including installation manuals and maintenance schedules.


    Comparative Table: Modular vs. Traditional Bathrooms

    Modular bathrooms are transforming modern construction with efficiency and innovation: modular bathrooms. They offer a smart solution to the challenges of modern construction, providing speed, cost savings, quality, and sustainability.

    Modular vs. Traditional Bathrooms


  • How to Make Sure Your Home Is Always Ready for the Unexpected

    How to Make Sure Your Home Is Always Ready for the Unexpected

    Life is unpredictable, and when the unexpected happens at home—whether it’s a burst pipe, a blocked drain, or a sudden power outage—it can quickly turn into a nightmare. But with a bit of preparation, you can keep your home ready for anything. In this guide, we’ll show you simple steps to ensure your home stays safe, comfortable, and stress-free, no matter what surprises come your way.


    Maintain Your Plumbing System: Be Proactive

    A well-maintained plumbing system is key to preventing costly emergencies. Regularly check for signs of leaks, water stains, or low water pressure—issues that could lead to bigger problems down the line. It’s also important to know where your water shut-off valve is located, so you can act quickly if a pipe bursts. Scheduling annual inspections with emergency plumbers can help identify potential problems early, before they turn into disasters. Taking these simple steps will give you peace of mind, knowing that your plumbing is ready to handle whatever comes its way.


    Regular Drain Maintenance to Prevent Blockages

    Clogged drains can cause a major disruption, but simple maintenance can help prevent the hassle. Avoid pouring fats, oils, or coffee grounds down your sink, as these can easily lead to blockages. Use drain covers to catch debris and prevent hair from accumulating. If you start noticing slow drainage or unpleasant smells, it could be a sign that your pipes are becoming blocked. To keep things flowing smoothly, consider scheduling a professional inspection for your drains. Searching for “drainage near me” can help you find experts who can provide regular cleaning and keep your plumbing in top shape.


    Check Your Home’s Heating and Electrical Systems

    The last thing you want during a cold snap is a broken heating system, or worse, a fire hazard caused by faulty electrical wiring. Ensure that your heating system is serviced regularly, especially before the colder months, and update anything that’s aging. It’s also crucial to check your boiler and radiators to make sure everything is running efficiently. On the electrical side, inspect your wiring and outlets for signs of wear or damage. Don’t forget to know how to safely turn off your gas, water, and electricity in case of an emergency, giving you control when it matters most.


    Know Your Local Emergency Contacts

    Having the right emergency contacts on hand can save valuable time when disaster strikes. Keep a list of important local numbers, such as emergency plumbers, electricians, or gas engineers, so you’re never left searching in a panic. You can find these numbers online or through word-of-mouth recommendations. Also, don’t forget to include your local council’s contact information in case of flooding or other environmental emergencies. Keeping these contacts in your phone or on a printed list ensures you’ll have access to the help you need at a moment’s notice.


    Final word

    Being ready for the unexpected isn’t just about responding when things go wrong—it’s about proactively preparing your home to handle any challenge with ease. With regular plumbing maintenance, clear drains, electrical and heating system checks, you can protect your home and reduce stress in the face of unexpected events. Take the time today to ensure your home is ready for whatever comes your way, and you’ll rest easy knowing you’re fully prepared.


  • How To Transform Your Backyard With Festoon Lights?

    How To Transform Your Backyard With Festoon Lights?

    Is your family’s backyard or garden looking a little dull? Want to create a fun, festive vibe for backyard barbecues, parties and relaxing summer nights? One of the easiest ways to completely transform outdoor spaces is by stringing up colourful festoon lights. Also called festival lights or party lights, festoons create an instant celebratory ambiance. In this guide, we’ll explore different styles of festoon bulbs, tips on planning your layout, how to safely install them, and ways to use festoons to illuminate your backyard gatherings all year long. Let’s get ready to throw on the backyard lights and how to transform your backyard with festoon lights


    Pick Your Festoon Bulb Style

    The first step is choosing the appropriate festoon lighting to fit your backyard’s style. Look at these options for popular choices:

    Vintage Edison Bulbs: The bulbs have exposed filaments to give the 19th century industrial chic look. Warm golden hue is ideal to create a vintage garden speakeasy.

    Globe Bulbs – Clear, globe-shaped bulbs offer bright, lively illumination. You can go with a simple, clear or go for colors like blue, red, or purple to create fun pops of color.

    The Flame Tip Bulbs – Shaped like traditional incandescent bulbs, with points, they give the impression of a flame-like flicker. Pick warm amber or white glass for an inviting and cozy atmosphere.

    Mini Bulbs: Elegant festoons made of small bulbs that are placed close to each other create more aesthetically pleasing decorations. They are great to draw attention to fences, trees or wrapping around columns.

    Make sure you match the bulb’s shape and hue to the yard’s style. If you want to create a fun outdoor space for the family, opt for brightly coloured globe lighting. Old-fashioned Edison bulbs are great to create elegant romantic backyard getaways.


    Plan Your Layout

    After you’ve chosen your bulbs for festoons It’s time to sketch out how you’d like to place them in your backyard. Make sure your layout plans for:

    • Lighting Areas – Highlight areas in which you need light, like patios or decks, pools, pergolas, pathways, gardens bars and buffets.
    • Wrapping and Accents Highlight architectural features such as plants, fences, trees and railings. Also, decorate the edges of buildings.
    • Hanging Heights – Determine appropriate levels to hang the strands of wire in accordance with the areas that are lit and the viewing angles. The typical height is 12-16 feet.
    • Ample Power Access – Make sure that you have outlets outside in the areas required to stop extension cords from crossing space. It may be necessary to install additional outlets.

    Drawing out the bulb strand’s placement for the best lighting can make the installation of your garden festoons a breeze.


    Choose Safe Installation Methods

    Outdoor installations are accompanied by electrical safety concerns. Use these guidelines:

    • Use outdoor-rated cords – Select weatherproof extension cords and lighting that is designed to endure the elements.
    • Timers as well as Smart Bulbs – Put lights on a timer that automatically turns off lights at dusk or smart bulbs that you can control via a smartphone remotely. Make sure that lights aren’t left on for the entire night.
    • To avoid tripping hazards, don’t conduct cords through walking areas. Make use of cable ramps to connect cords to paths. Be sure to keep cords away from furniture.
    • Examine for damage – Check the cords on your festoon regularly for cracks fraying, losing, or loose plugs. Replace damaged strands right away.
    • Hire an electrician when needed If you require outlets or if the installation of a festoon is complicated, you should hire an electrician licensed by the state. Security first.

    With the proper weatherproofing equipment and a few smart safety measures You can put up outdoor festoons in a safe manner and enjoy the setting worry-free.


    Light Up Special Events

    The proper lighting can set the mood for backyard events and celebrations. Make use of festoons to light:

    • Dinners al fresco Place a line of patio furniture Edison bulb swags that glisten over the ceiling to create a chic outdoor dining space for festive dinners.
    • Pool Parties – Drape globe cords around umbrellas, pool decks and palms to create an exotic look.
    • Backyard BBQs: Wrap colored bulbs around rails, bar areas, and fences to make a great all-American cookout experience.
    • Cocktail Parties Mini flames – Place mini-flame-shaped amber glass confettis around lounge areas to create a sophisticated party fashion.
    • Moonlight Movies – Hang festoons over blanket forts or chairs in order to make a beautiful drive-in theatre.

    The glow of the holiday lights instantly enhances any backyard event from family pizza meals to graduation parties to romantic date nights in the evening under stars.


    Enjoy Year-Round

    The lights of the festoon aren’t only for the summer months. In winter, they bring joy to:

    • Festive parties – String them up over the patio or set them within an evergreen tree.
    • Cozy bonfires – Cover the fire pits with wood and put them in storage bins to keep warm.
    • Wintery evenings with snowy reflections reflecting off the fresh snow, they create an enchanting light.

    With the right lighting and clever placement Your family can have the outdoors with a dazzling display all year long regardless of the weather.


    The stringing of festoon lights opens numerous possibilities for outdoor enjoyment, celebration, entertaining and entertaining. The transformation of your outdoor space is as simple as plugging in lights that are festive. Let your imagination shine through the glare of outdoor lights all year round.


  • Transform Your Bathroom with PVC Ceiling Panels

    Transform Your Bathroom with PVC Ceiling Panels

    When you’re tackling a bathroom remodel, it’s easy to forget about the ceiling. But believe it or not, this often-overlooked area can be crucial for your space. If you’re on the hunt for something that’s not just stylish but also easy to care for, consider adding ceiling panels to your list. Let’s explore why these panels could be an addition to your next home improvement project.


    Why choose PVC ceiling panels?

    1. Waterproof and durable

    Bathrooms are well-known for their high humidity levels, a perfect recipe for pesky problems like black mould. What makes ceiling panels such a fantastic option is their completely waterproof nature. They are perfect for spaces that face constant dampness. Unlike plaster, PVC doesn’t warp or deteriorate over time, so your ceiling stays looking fresh and clean for years.

    2. Low maintenance

    One of the biggest advantages of PVC ceiling panels is their ease of maintenance. With no grouting to worry about, cleaning becomes a simple task. All you need is a damp cloth to wipe down the surfaces and remove any water spots or soap residue. This means less time scrubbing away at stubborn stains.

    3. Stylish designs

    No matter what your style is — be it contemporary, classic, or a mix of both — you’ll find a panel design that perfectly suits your taste. These panels come in a wide range of textures, and finishes, allowing you to achieve the appearance of wood, marble, or a glossy modern look.

    Whether you prefer the clean simplicity of white panels for a minimalist vibe or want to spice things up with unique patterns, the design options are virtually limitless.

    4. Easy installation

    If you’re looking for a DIY bathroom remodel, the ease of installation of PVC panels is a big plus. They typically come with a tongue-and-groove system that allows for straightforward installation, with no complicated tools needed. You can achieve a professional-looking finish in a fraction of the time.

    5. Cost-effective solution

    Remodelling a bathroom can be expensive, especially when considering all the materials and hiring a decorator. PVC panels are a budget-friendly option that doesn’t sacrifice quality for cost. In choosing them, you can produce a modern look without breaking the bank, making them an excellent choice for homeowners on a budget.


    The perfect addition to any bathroom

    Whether you’re creating a luxurious spa-like retreat or a practical space for daily routines, PVC ceiling panels can help you achieve the look and functionality you desire. They are particularly well-suited for wet rooms, shower areas, or spaces that require a little extra care against moisture.

    Installation tips

    While installing panels is relatively easy, there are a few things you can do to make everything go smoothly:

    1. Measure your space: Before purchasing your panels, make sure to measure the area you plan to cover. You don’t want to waste money on panels that don’t fit.
    2. Choose a style: Take time to consider the overall theme of your bathroom. Pick a colour and design that will complement your existing fixtures and decor.
    3. Prepare the surface: Before installing the panels, ensure the ceiling surface is clean and smooth. This will help the panels adhere better and prevent any issues down the line.
    4. Follow manufacturer instructions: Each brand may have specific installation guidelines, so be sure to adhere to those for the best results.


    Conclusion

    To wrap things up, PVC ceiling panels genuinely offer a brilliant way to elevate your bathroom aesthetics. They stand out not only for their water resistance and long-lasting nature but also for their ease of upkeep, a real bonus for anyone with a busy lifestyle. With a plethora of designs to choose from, you can effortlessly select something that resonates with your home’s style without straining your budget.

    If you’re considering injecting some freshness into your space, using PVC ceiling panels is a wise decision. Step into a stylish and functional bathroom that you will cherish for years to come.

  • Tips for Improving Your Home Security

    Tips for Improving Your Home Security

    Your home is your castle but that doesn’t mean you have to turn it into a fortress to keep it safe. With just a few practical steps and minimal expenditure, you can make your property a far less attractive proposition to intruders.


    Securing Doors and Windows 

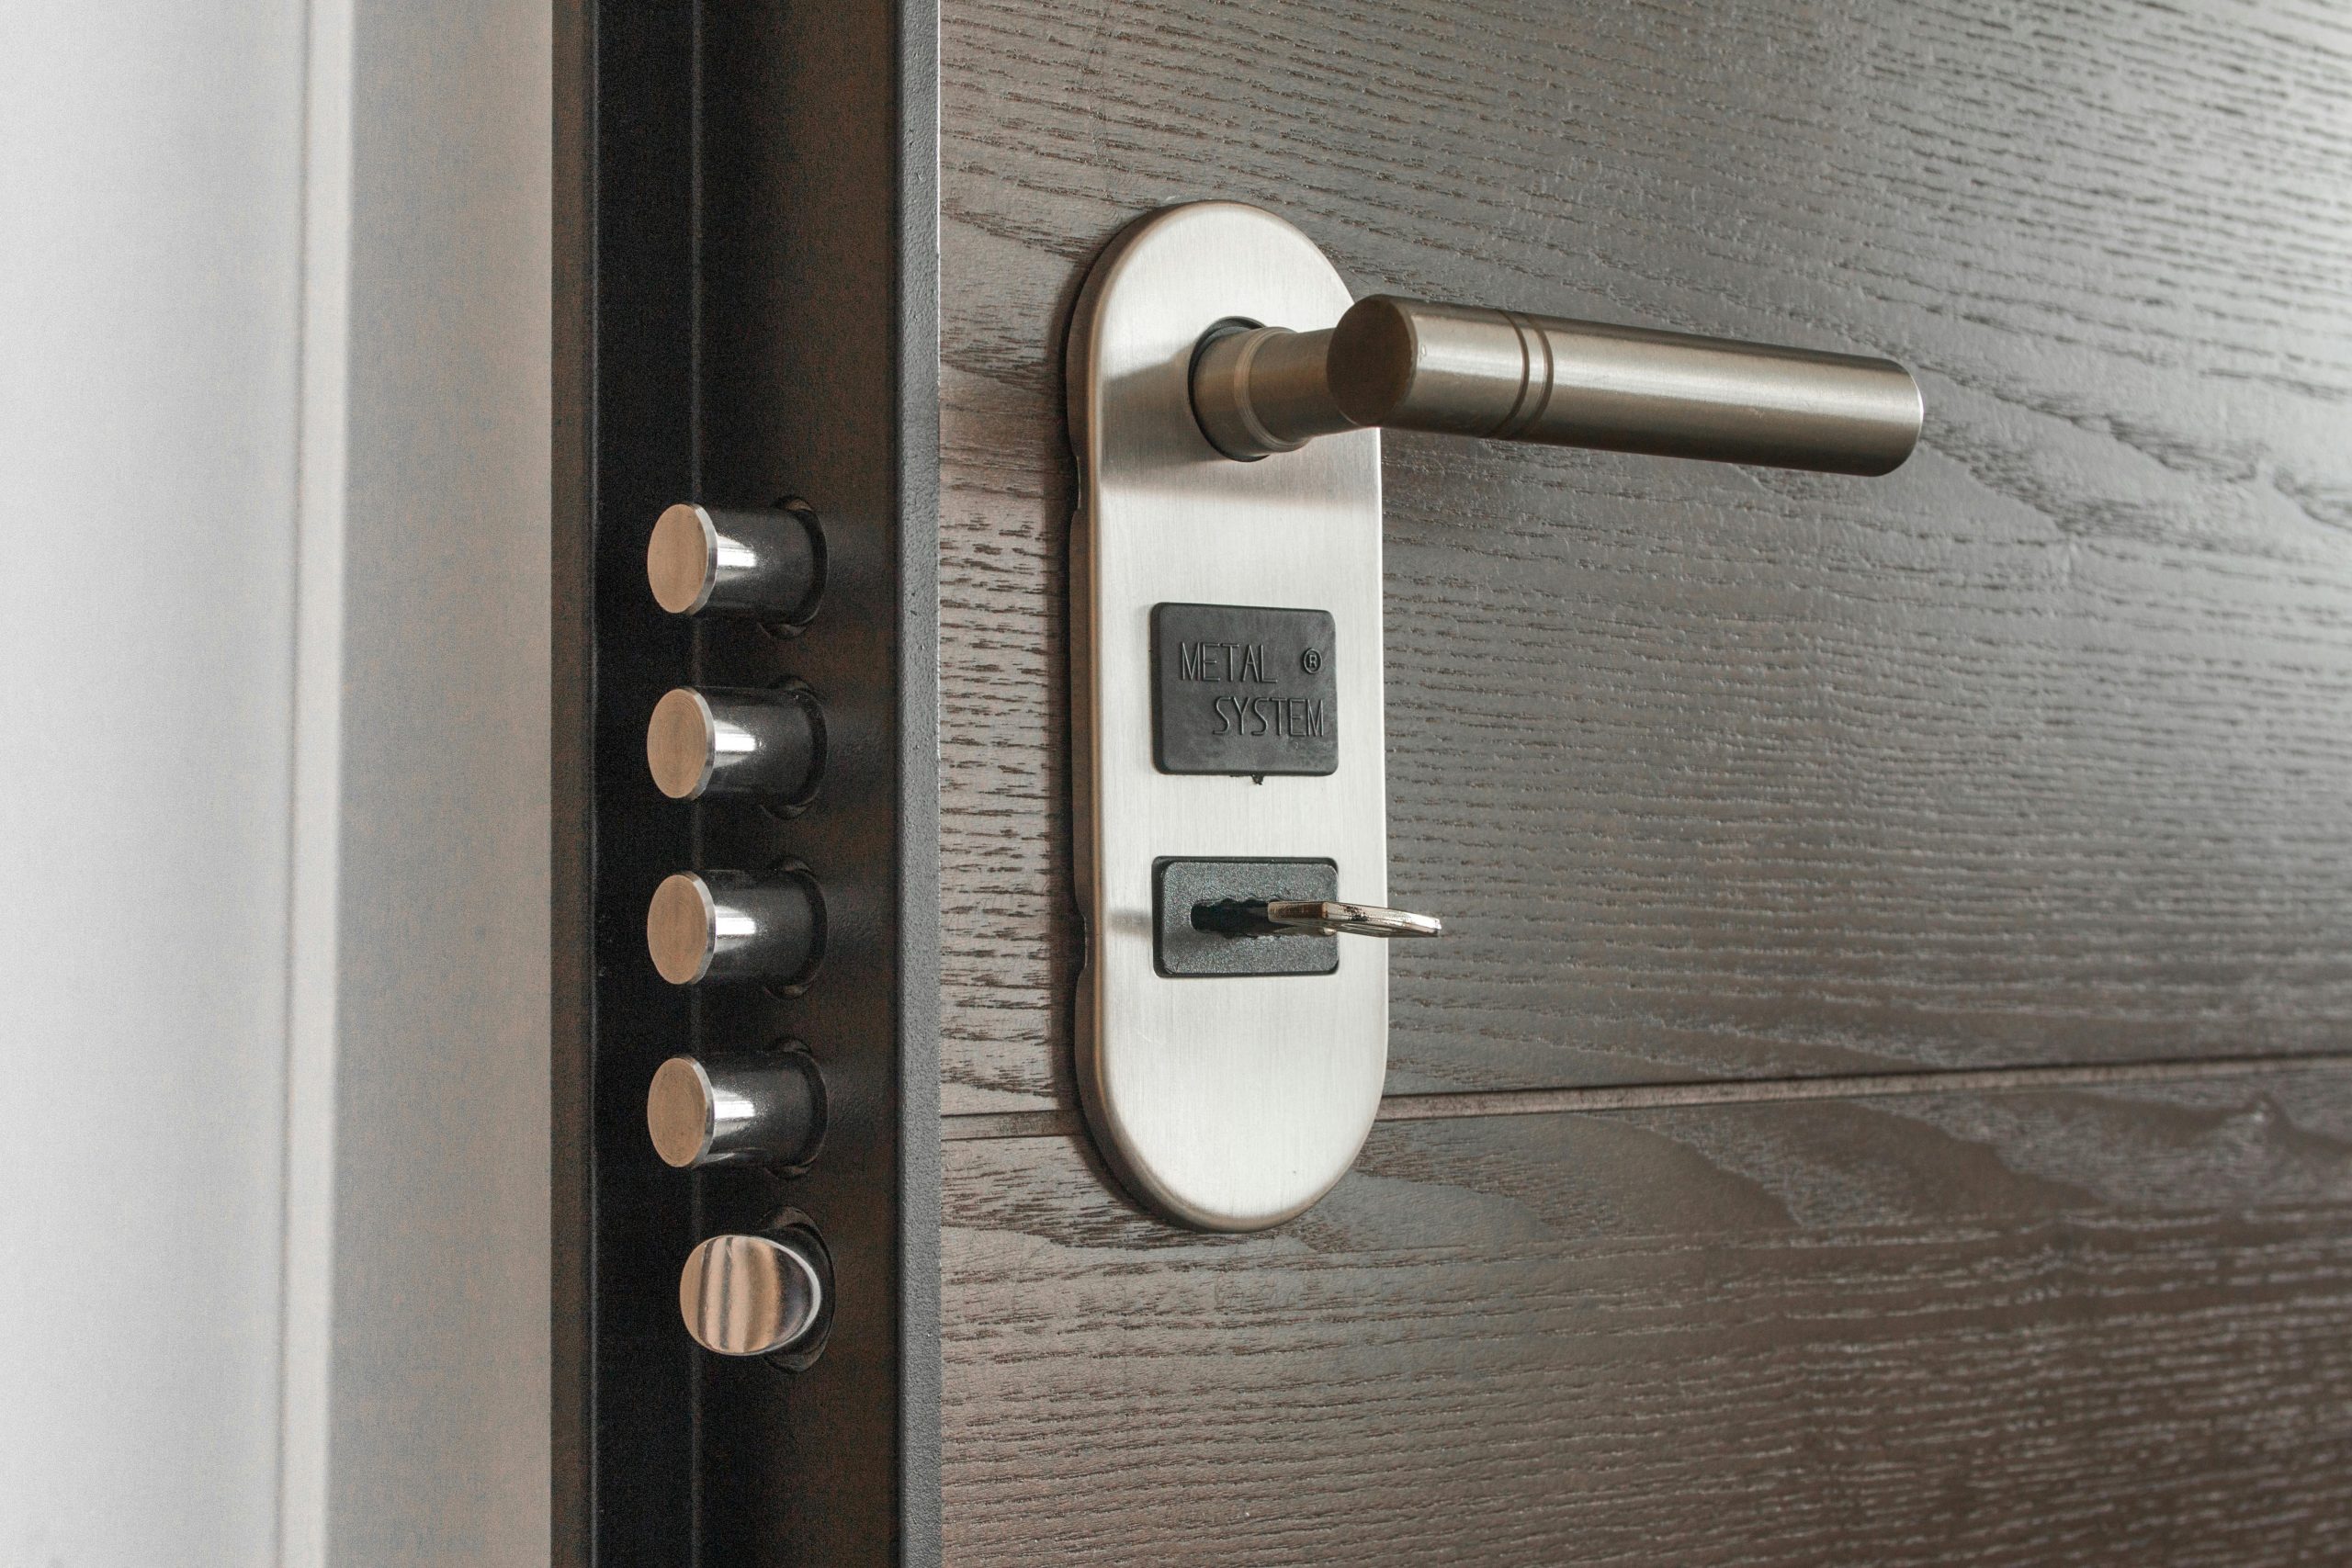
    Doors and windows are the most common entry points for burglars, so they’re always the best places to start when beefing up your home security. Start by ensuring all external doors are fitted with robust locks. A five-lever mortice deadlock that meets BS3621 standards is recommended by UK police and insurance providers alike and should be the bare minimum. Sliding doors, meanwhile, should have additional bolts or bars to prevent them from being forced open. All ground floor windows (and any easily accessible upper floors) should also have secure, key-operated locks and you should consider installing laminated glass or security film to your windows to make them that much harder to break.


    Installing Visible Security Measures

    Any burglar is making a calculated risk when invading a home so visible deterrents are often more than enough to make an intruder think twice. Security cameras placed around entrances and driveways not only record activity but also send a clear message that the property is monitored, and alarm systems, especially those with a prominent external box, are equally effective. Motion-activated lights, meanwhile, are not only convenient but can also expose anyone approaching after dark. Install them near doors, garages, and side passages as most burglars will be spooked by a light and leave before even attempting a robbery.


    Enhancing Garage Security

    Garages are often overlooked when it comes to home security, but they can be an easy target. Many garages contain valuable tools, bikes, and sometimes even direct access to the house, so it’s certainly not something you want to overlook. Upgrading to roller garage doors can help protect these areas as their sturdy construction, minimal gaps, and integrated locking systems make them harder to force open compared to traditional up-and-over designs. Of course, you should also always keep your garage locked, even when you’re at home.


    Maintaining Landscape and Exterior 

    Well-maintained exteriors do more than boost curb appeal—they can actually prevent crime. Overgrown shrubs and trees can provide hiding spots for burglars so keep them trimmed, particularly near doors, windows, and garden gates. It’s not just what you’re seeing either. Sound plays a major role in most home robberies. Gravel driveways and paths can add an extra layer of protection by creating noise underfoot, alerting you to movement.


    Final Thoughts

    Improving your home security doesn’t have to be complicated or costly. Focus on key areas like securing entry points, adding visible deterrents, upgrading vulnerable access points like garages, and maintaining a clear and well-lit exterior. Small changes can make a big difference in keeping your home safe and it doesn’t need to cost a fortune either.


  • How to Choose the Right Curtain Length and Width for Any Window

    How to Choose the Right Curtain Length and Width for Any Window

    Most homeowners buy curtains primarily to obstruct light and enhance privacy. Others look for curtains with an aesthetic purpose to bring in much-needed warmth and color. A good number don’t know that when purchasing curtains, it’s critical to select the right size that goes well with your window. If you pick too short, they could look like a terrible haircut. If you go for too long, they might become a chaotic fabric pool.

    Whether it is for privacy or aesthetic, the perfect curtain width and length should provide elegance, balance, and the right amount of drama to your home. As a homeowner, you may wonder what the appropriate length and width are for your window curtains. We’ll lead you through the necessary procedures to achieve window-dressing perfection.


    What Are the Standard Curtain Sizes?

    The standard curtain size is more of a guideline than a one-size-fits-all regulation. The length of the curtain varies depending on the style you select and the height of your windows, but the width is usually based on a standard panel size.

    Most pre-made curtains are 48 inches wide. If your window is wider than 48 inches, you will require more than one panel to provide the fullness and total coverage you seek. For a gathered, opulent look, your curtain width should be 1.5 to 3 times that of the window.

    The length of the curtains significantly impacts the overall appearance of the room. There are four basic variations of standard curtain lengths:


    • 63 inches is the window length, with curtains hanging just below the sill. It is best for informal areas such as toilets and kitchens.
    • 84 inches are made to float slightly above the ground and are frequently used in living rooms and bedrooms for a functional yet fashionable appearance. 
    • 96 inches is a fantastic choice for a floor-length drape. They produce a refined, long-lasting impression.
    • The 108-inch curtain length gives a dramatic, full-length flow, making it suitable for large, high-ceilinged settings.


    Curtains might be over 120 inches for those who prefer a more sumptuous or individualized look. To ensure a visually appealing and complete drape effect, have custom made curtains that closely match the size of your window. Custom curtains allow you to choose the exact width, length, and fabric type for a sophisticated and fitted appearance. This is especially useful for large or oddly shaped windows when standard sizes may not provide sufficient covering or the desired effect.


    Choosing the right curtain size for your windows

    Choosing the right curtain size is vital for giving your room a professional and well-proportioned appearance. The perfect fit not only improves the appearance of your window but also complements your interior style. This section will review the most important factors to consider when selecting the ideal curtain sizes for your windows.

    Measure Your Windows Accurately

    Well-fitting curtains are based on accurate measurements. For the most accurate results, start with a metal measuring tape. Measure your window’s entire width, including the frame. Note the height between the top of the window and the desired curtain end.

    Plan to provide 4-6 inches of room on either side of the window to position the rod correctly. Three to four inches should separate the rod from the window frame. Thanks to this additional room, you may fully open your curtains and let in more light when you need it.


    Considerations for Window Height

    The height of your window is a major consideration when choosing a length. 84-inch panels work nicely with standard windows, giving the room a clean floor line. For complete coverage, 96-inch or 108-inch curtains are required for taller windows. 63-inch lengths go well with shorter windows.

    Maintain a half-inch gap between the curtain hem and the floor for a clean appearance. To create a soft break where the cloth touches the floor, add 1 to 2 inches if you like a smoother look.


    Think About the Width

    The size of your track or pole should be considered when determining the width of your curtains. Since you need to double the width of your track or pole in curtaining to achieve the gathered look, the width measurement relates to the width of each curtain in the pair. In addition to blocking out as much light as possible, this will make your drapes appear full and opulent.

    Because it varies on the window size, there is no set width for curtains. Nonetheless, 96 inches is the typical length for curtains. The 95-inch or 96-inch labels are occasionally applied to the single size.


    Room Style Impact

    Each room has a unique ideal curtain length based on its purpose and decor. Floor-length curtains provide dining and living rooms with a sophisticated, elegant look while adding structure and refinement to the surroundings. Meanwhile, to keep kitchen curtains clean and functional for daily use, they should be kept at sill length.

    The length of bedroom curtains is determined by personal preference. Some would want floor-length drapes for a warm, luxurious ambiance, while others choose shorter ones for a more laid-back look. Shorter panels are required for bathroom windows to keep them clean and prevent moisture gathering. Throughout your home, you may achieve elegance and functionality by tailoring curtain lengths to the needs of each room.


    The Position of Furniture

    Before choosing the length of your curtain, consider how your room is laid out and any impediments that may affect how the fabric drapes. Choose a length that avoids obstructions while maintaining a polished appearance, as radiators, heating vents, and air conditioners near windows can all impact airflow and functionality.

    Furniture layout is also important; to avoid bunching or awkward draping, drapes for window seats, cupboards, or sofas near windows may need to be shorter or placed more carefully. Remember to measure for baseboards to ensure your curtains blend in with the decor without blocking key aspects.


    Curtains are important for creating a room’s atmosphere because they give privacy, light control, and insulation, and add color, flair, and personality. A space can be transformed with the right curtains, giving it a more polished and friendly appearance. However, selecting the right size involves carefully considering various factors, including the window size, the type of curtain, and the overall design you want to achieve. Knowing these variables allows you to confidently select curtains that will improve the appearance and functionality of your room while also suiting your windows.

  • From House to Home: A Guide to Enhancing Comfort & Functionality

    From House to Home: A Guide to Enhancing Comfort & Functionality

    A house is just a structure, but a home is a feeling. It’s the place where you unwind after a long day, where memories are made, and where you should feel completely at ease. But turning a house into a home doesn’t happen by itself. It requires intentional choices to ensure comfort and functionality work together. From upgrading your bedroom for better sleep to organising your kitchen for efficiency, every change you make can have a lasting impact. If your space doesn’t feel quite like home yet, don’t worry—this guide will help you create a space that truly reflects warmth, personality, and practicality.


    1. Smart Storage: Making the Most of Every Inch

    One of the biggest challenges in any home is keeping things organised. Smart storage solutions help maximise space while keeping everything in order.

    Evaluate the items you own and get rid of things that are no longer necessary. Once you’ve decluttered, invest in multi-purpose furniture, such as beds with built-in storage, ottomans that double as storage boxes, and extendable dining tables.

    For smaller homes, wall-mounted storage is a game-changer. Floating shelves free up floor space, and vertical storage units make use of height rather than width. Keeping things tidy doesn’t mean hiding everything away—organising items in a way that is both functional and aesthetically pleasing can make a space feel larger and more welcoming.


    1. Prioritise Your Comfort: Upgrading the Bedroom

    The bedroom is the most personal space in any home. It’s where you retreat after a long day, and the quality of your sleep depends largely on the environment you create. So, what’s the first and most important investment? A good mattress. A poor-quality one can lead to restless nights, back pain, and long-term health issues.

    However, you must know how to choose a mattress. Choosing the right mattress depends on individual needs and sleeping habits. Memory foam mattresses provide excellent pressure relief by contouring to your body, making them ideal for those who experience joint pain. Open spring mattresses are a more budget-friendly option and offer good airflow, but they may not provide the same level of support in the long run. Hybrid mattresses combine foam and springs, offering a balance between comfort and durability. Those looking for an eco-friendly and hypoallergenic option might prefer a bamboo mattress, which naturally wicks away moisture and helps regulate temperature.

    Beyond the mattress, consider other elements that enhance relaxation. Blackout curtains block out unwanted light, breathable bedding keeps you cool, and a clutter-free environment promotes a sense of calm. The bedroom should be a sanctuary, a place where you can fully unwind and recharge.


    1. The Living Room: A Space for Connection and Relaxation

    The living room is usually everyone’s favorite place. It’s where families gather, guests are entertained, and moments of relaxation take place. Comfort should be the top priority, and this starts with seating. A good sofa should provide both support and cosiness. Deep cushions, soft fabrics, and enough space to stretch out can make a huge difference.

    Lighting also plays a big role in setting the mood. A single overhead light can feel harsh, so layering different types of lighting creates a more inviting atmosphere. Floor lamps, table lamps, and dimmable ceiling lights allow you to adjust brightness depending on the time of day and activity.

    Personal touches bring character to the space. A living room should reflect the people who live in it, so adding books, artwork, family photos, and soft furnishings like cushions and throws makes it feel truly yours.


    1. Kitchen Efficiency: Function Meets Aesthetics

    A well-organised kitchen can make everyday life easier. Functionality should come first, but that doesn’t mean compromising on aesthetics. The key to an efficient kitchen is keeping work surfaces clear, ensuring that everything has a designated place, and making sure the space is easy to navigate.

    Quality storage solutions are essential. Kitchen drawer organizers and cabinets can be a great option to maximize your kitchen’s efficiency and style. They keep utensils neat, spice racks prevent clutter, and hanging storage for pots and pans frees up cupboard space. If possible, opt for pull-out shelves in deep cabinets to make accessing items easier.


    1. The Bathroom: A Mini Spa at Home

    The bathroom is one of the most important rooms when it comes to comfort and relaxation. A well-maintained bathroom can feel like a personal spa with just a few simple changes. Soft towels, quality toiletries, and calming scents can help create a luxurious atmosphere.

    If possible, upgrading fixtures such as the showerhead or taps can improve the overall experience. Scents also play an important role in creating a calming environment. Essential oils, scented candles, or even fresh eucalyptus in the shower can help transform an everyday routine into a more relaxing experience.


    1. Home Office: Boosting Productivity in Comfort

    With more people working remotely than ever before, having a dedicated workspace is essential. But simply placing a desk and chair in a corner isn’t enough—comfort and organisation are important for productivity.

    Invest in a good-quality chair. Since most of the day is spent sitting, investing in an ergonomic chair with proper lumbar support can help prevent back pain and discomfort. The desk should also be at the right height, ensuring your arms rest comfortably while typing and your screen is at eye level to reduce strain on the neck.

    Keep clutter to a minimum by using storage boxes, filing systems, and cable organisers to prevent wires from becoming a tangled mess. A tidy space leads to a tidy mind, helping to keep distractions at bay and allowing you to work more effectively.


    1. Scent and Sound: The Subtle Elements That Make a Difference

    You might not think much about them, but scent and sound play a huge role in creating a comforting home environment. The way a space smells, and the background sounds that fill it can have a profound impact on mood and relaxation.

    Scents have the power to trigger emotions and memories. Using scented candles, essential oil diffusers, or fresh flowers can make a home feel warm and inviting. Lavender and chamomile promote relaxation, citrus scents add freshness, and woody aromas create a sense of warmth.

    Sound also contributes to the atmosphere of a home. Background music, nature sounds, or even the gentle hum of a water fountain can create a soothing environment. A well-placed speaker system or a simple playlist can help shape the mood of a space, whether you need energising tunes to start the day or soft instrumental music to wind down in the evening.


    Small Changes, Lasting Comfort

    A house becomes a home through thoughtful details that enhance comfort, functionality, and personality. Every small change adds up to create a space that feels warm and welcoming.

    Remember, creating a home doesn’t mean following trends or making expensive upgrades—it’s about making intentional choices that reflect your lifestyle and bring you joy. When your surroundings support your needs and provide a sense of peace, your house truly becomes a home.


  • Transform Your Home’s Atmosphere with Carefully Selected Colors and Features

    Transform Your Home’s Atmosphere with Carefully Selected Colors and Features

    Color is what gives life an added layer of interest, intrigue, and overall excitement. There is something comforting and joyful about seeing how the correctly paired hues can interact with their environment to create spaces that can boost your mood, relax your mind, and simply make you feel utterly at ease as soon as you walk into a room. By selecting the right colors for your home, you can create a space that matches your personality and offers all of the above, all with minimal effort on your part (as long as you’re handy with a paintbrush, of course!) Here, we’re looking at how you can transform your home by ensuring that you choose the right colors for whatever atmosphere you’re trying to achieve. 


    Understand Color Psychology Before Investing In Any Materials Or Hiring Contractors

    If you’re just browsing the web for a few pointers on how to start the process of painting your house, you might very well roll your eyes at the mention of color psychology. While that’s a fair reaction, after all, the web seems to be filled with unrelated slop these days, but the fact of the matter is that by spending a bit of time getting to know how different colors create different moods and feelings, you can avoid spending a fortune on hues that simply don’t sit well once they’re on the walls. So, when it comes to interior house painting, what are we talking about with regard to human psychology? Essentially, different colors have been shown to elicit differing emotions and responses in our minds, and as such, the colors you use in various rooms will have a considerable impact on the atmosphere and general “feel” of the space. 


    • Warm Colors (Reds, Oranges, Yellows): As you might imagine, warmer hues are primarily associated with passion, happiness, and general joy. Using these colors in a room will elevate the mood by boosting the feeling of energy.
    • Cool Colors (Blues, Greens, Purples): Generally speaking, cooler shades are associated with relaxation and calm, making them perhaps best in bedrooms and living rooms where unwinding is the name of the game. However, you can also use them in your kitchen to generate a feeling of space and freshness.
    • Neutral Colors (Whites, Grays, Browns): Neutral might sound dull to most folks, but they absolutely have their place. If you’re trying to create a minimal aesthetic, these colors will offer the best outcomes and help establish a sense of groundedness.

    The colors you choose will have a much more significant impact on how you feel about your space than you might think, so investing in the various hues and their subsequent associations will help you select the right option.


    Use Neutrals To Balance Vibrancy Where It Makes Sense

    To follow on ever so slightly from the previous point, neutral colors can contribute a lot more to an aesthetic than simply being a color that you choose because you can’t agree with your significant other! If your home is already a place of vibrancy and joy, a splash of brown, greys, and off-whites can help with balancing things and lower the energy. Why might you want to reduce the energy, you might ask? Well, obviously, this is up to you and how you live your life, but sometimes, an aesthetic can be too overpowering and never allow you to switch off and relax entirely. Your home is a place where you ought to feel most comfortable and at ease, and if there is too much color, you might discover that you’re never able to decompress. 


    Incorporate Natural Light To Really Show Off Your New Colors

    Now, we move on to what we can consider to be more of a feature than anything else. Incorporating natural light is an amazing idea for many reasons, but when we consider it in relation to the colors you choose, it can really help show them off in their best light. If you’re struggling to add more light or unable to increase your budget to extend to skylights, etc., you can utilize the famous mirror trick that is oh-so-popular among interior designers.  We are, of course, talking about using mirrors, which also happens to lead very nicely to our next point!


    Utilize Mirrors To Expand Spaces And Create A Feeling Of Openness

    Mirrors have long been used by all sorts of people and in all manner of homes for the purposes they’re intended for (to show your reflection), but also to generate the illusion of more light, openness, and airiness even when inside a tiny room. In many ways, when you use a mirror strategically, you are able to create entirely new spaces that hit differently. For instance, if you’re in a living room with only one small window, you can place a farmed mirror opposite it to reflect and bring some of the outdoors inside. It also means that you are amplifying the natural light that comes from that window, making it almost as though you have double the number of windows and reaping the benefits of having such.


    Create Accent Walls To Form Focal Points

    An accent wall might be a worn-out option for many who are seeking something a little more contemporary, but the fact is that when they’ve been crafted tastefully, you can really add a sense of symmetry and focus to any room. They usually work best in rooms that already have some sort of focus point, like a fireplace or indented or extruded wall, but with a bit of careful thought, they should work almost anywhere.


    Select Indoor Plants That Complement The New Style

    There is something exquisite about bringing in some of the outdoors inside (and not just in the sense of using the aforementioned mirror!) Plants can create a sense of freshness that you are generally unable to achieve from anything else, and if you opt for the species that are most straightforward to care for, you’ll find that they only require the most minimal of maintenance while providing you with something that you will never be able to acquire from artificial techniques.

    Transforming your home from the humdrum and decidedly average to a space that truly represents who you are needn’t be overly complex. These tips should get you started on the right track, and with a little more research, you’ll end up with a home you’re proud to have put in the effort.


  • Give Your Home Exterior The Wow Factor With These Stylish Front Door Details

    Give Your Home Exterior The Wow Factor With These Stylish Front Door Details

    An attractively designed front door can transform the facade of your house, setting the tone for the entire property. By focusing on a few key elements, you can enhance the appeal of your entrance, creating a welcoming and stylish doorway that reflects your personal taste and the character of your home.


    Colour Your World

    Selecting the right colour for your front door is a decision that can dramatically alter the appearance of your home. Bold and vibrant hues such as deep reds or sunny yellows can inject personality and energy, making your home stand out. For a more understated elegance, consider classic shades like navy blue, forest green, or even a sophisticated black.

    On the other hand, if your home features neutral tones, a brightly coloured door can serve as a striking focal point. Think about the message you want to convey: a red door can signify a warm welcome, while blue might represent tranquillity.


    Lighting the Way

    Good lighting is essential for both safety and aesthetics. A well-lit front door is welcoming to guests and discourages potential intruders. Consider stylish fixtures that complement your home’s architecture. For a traditional home, classic lantern-style lights can add charm, while sleek, modern designs suit contemporary homes.

    Illumination is not just about the practicality of visibility; it’s an opportunity to create ambience. Soft, warm lights can create a cosy and inviting atmosphere, while brighter lights can make a bold statement. Positioning is key: lights should flank the door or be overhead, casting an even glow that highlights the door’s features. Thoughtful lighting enhances your door’s beauty at night, transforming it into a radiant focal point of your home’s exterior.


    Door Furniture with Flair

    The hardware on your door, such as handles, knockers, and letterboxes, is more than just functional; it’s an opportunity to inject style into your entrance. Sleek, modern designs with clean lines and minimalistic features suit contemporary homes, while ornate brass or wrought iron hardware can complement traditional properties.

    The finish of your door furniture plays a significant role in its overall impact. Polished brass or chrome can add a touch of luxury and shine, while matte black or brushed nickel offers a more modern, subtle look. Don’t forget about the smaller details like the doorbell or house numbers; these should also align with the overall style of your door, creating a cohesive and thoughtfully designed entrance.


    Handle It With Style

    The choice of door handle can have a significant impact on the overall look of your entrance. For those looking to add traditional charm, consider some attractive brass door furniture for a rustic yet elegant look. These handles offer functionality and serve as a focal point, injecting a sense of sophistication and style to your door.

    When selecting door handles, consider their ergonomics and ease of use, as well as their aesthetic appeal. The shape and size should feel comfortable in hand, and the mechanism should operate smoothly. Additionally, the finish of the handle should resist weathering and maintain its appearance over time, ensuring that your door continues to look stunning for years to come.


    Planters and Greenery

    Adding planters and greenery to your front door can instantly uplift the space, introducing colour, texture, and life. Symmetrically placed planters create a sense of balance and formality, ideal for traditional homes. Alternatively, a more eclectic arrangement with varying sizes and styles of planters can lend a relaxed, bohemian feel.

    Choose plants that complement the style of your home and the local climate. Evergreens offer year-round lushness, while flowering plants can add seasonal colour. Consider the maintenance requirements too; opt for low-maintenance varieties if you’re not an avid gardener. The right greenery can transform your front door into a verdant, welcoming entryway, full of life and natural beauty.


    Personalised Touches

    Your front door can reflect your personality with the addition of bespoke elements. A custom house number or a unique nameplate can make a world of difference, giving your home a distinctive identity. These small details, while often overlooked, can significantly enhance the aesthetic appeal of your entrance.

    Consider materials and designs that resonate with the overall theme of your home. A sleek, modern number plaque might suit a contemporary residence, while a hand-painted ceramic or carved wooden sign could complement a more traditional setting. This is your chance to be creative and express your individual style, making your home truly one-of-a-kind.


    Statement Door Mats

    A doormat is more than just a functional item to keep your floors clean; it’s an opportunity to make a style statement. Choose a mat that reflects your personal taste and the character of your home. From bold patterns and bright colours to witty messages and elegant designs, the right mat can set the tone for your home’s interior.

    The size and shape of the mat should fit your doorway and be appropriate for the amount of foot traffic it will receive. Durable, easy-to-clean materials are a practical choice, ensuring your mat stays looking great throughout the year. A well-chosen doormat can be a delightful greeting for your guests, adding both style and function to your entrance.


    Architectural Details

    Architectural elements like pediments, pilasters, or decorative moulding can elevate the look of your front door, adding depth and character. These features can enhance the door’s prominence and create a grand, sophisticated entrance. Consider elements that complement the architectural style of your home, whether it’s a classic Victorian, a modern minimalist, or something in between.

    Incorporating these details requires a thoughtful approach. The scale and design should be in harmony with the rest of the home’s exterior. For example, a classical pediment might be ideal for a Georgian-style home, while clean, geometric lines might suit a more contemporary property. These architectural details can transform a simple entrance into a striking, memorable facade.


    Seasonal Decor

    Embrace the changing seasons by decorating your front door area to reflect the time of year. In autumn, consider a wreath made of fall leaves and berries. For spring, fresh flowers and pastel colours can brighten your entrance. During the festive season, twinkling lights and holiday decorations add a magical touch.

    Seasonal decor is a wonderful way to keep your entrance looking fresh and inviting all year round. It’s also an opportunity to celebrate and participate in the festivities of each season. Be mindful of the scale and style of your decorations, ensuring they complement your home and create a welcoming atmosphere for your guests.


    Security with Style

    Security is paramount, but it doesn’t have to come at the expense of style. Choose a sturdy, well-fitted door with high-quality locks and security features that blend seamlessly with its design. Modern technology offers a variety of options where functionality and aesthetics meet, allowing you to protect your home without compromising on its appearance.

    Consider security elements that are in keeping with the style of your door and home. For example, a traditional home might suit a classic mortice lock, while a smart lock could perfectly fit a contemporary residence. Ensuring your home is safe and secure is crucial, but you can achieve this without sacrificing style with the right choices.


    Summing Up

    Transforming your home’s exterior with stylish front door details is an achievable and rewarding endeavour. By focusing on elements such as colour, lighting, hardware, and personal touches, you can create an entrance that is not only inviting but also a true reflection of your style. The front door is the focal point of your home’s exterior and deserves careful consideration and creative flair. With these tips, you can give your home the wow factor it deserves, making a lasting impression on all who visit.

  • Diy Plumbing Fixes: When To Try It And When To Call A Pro

    Diy Plumbing Fixes: When To Try It And When To Call A Pro

    When something goes wrong with your home’s plumbing, your first instinct may be to try fixing it yourself. But is DIY always the best approach for plumbing repairs? This article looks at common plumbing issues and gives tips on when DIY repairs make sense and when you’re better off calling a professional plumber like Plumberoo Plumbing Bondi Beach

    A plumber too should be well equipped and knowledgeable, he must be sure about what a plumber needs to know when working in Bondi Beach or any other area. DYI on the other hand seems cool, but should be done only on simple issues, not on major ones. Lets know it better: 


    Clogged Drains

    Clogged drains are one of the most frequent plumbing headaches in any home. Slow-running water or backed up sinks and tubs are very annoying. Trying to unclog a drain yourself using a plunger or drain snake is often worthwhile. This may break up the blockage and get water flowing freely again. However, if you can’t seem to clear the clog after several drain cleaner attempts, it’s time to phone a plumber. Their high-powered equipment is made to cut through serious clogs beyond DIY methods.


    Leaky Faucets

    A constant drip-drip-drip from bathroom or kitchen faucets can drive you crazy. Often a simple fix like changing worn washers or o-rings will stop the leak. This is a fairly easy DIY job for most basic sink faucets. Just turn off the water supply lines first before taking things apart.

    However, if you have a fancy touch-sensor faucet or complex shower system, call the pros. You don’t want to damage expensive fixtures.


    Running Toilets

    Toilets that keep running nonstop will seriously inflate your water bill. Again, a quick DIY approach like replacing the flapper valve at the bottom of the tank can usually fix this. But don’t mess around inside the toilet tank if you have an advanced low-flow or high-efficiency model. Call the plumber to avoid messing up more complex mechanisms.


    Burst Pipes

    No one wants to deal with water spewing from a burst pipe. In a pinch, you can shut off the main water valve to stop flooding temporarily.

    But pipe repairs require cutting out and replacing the broken section, then soldering or clamping the new piece – not a novice DIY job. Calling pros for burst pipe repairs is a must.


    Low Water Pressure

    Insufficient pressure from the water can make showers incredibly weak. There are a few DIY methods worth a try such as checking faucet aerators to detect mineral build-up, and then cleaning shower heads.

    If none of these solutions work it could be a problem with the primary water line, or the pressure regulator. You should contact a professional plumber to look into and correct the problem at hand.


    Gas Leaks

    If you smell the rotten egg smell of gas leaks in your home and your gas bill suddenly increases, you must leave your house and contact Gas company, or the fire department immediately. Do not attempt to repair gas leaks yourself. Repairs to gas lines can be extremely risky for DIYers due to dangers of explosions and fire. First, safety first.


    Sewer Line Clogs

    Sewer lines that are clogged and don’t drain properly will require expert assistance. Homeowners are usually responsible for the clogs that occur in the sewer line that runs connecting their house and the main pipe. Pros offer drain augers which can go through sewer clogs with a thick layer that can block DIY equipment. They also provide pipe relining as an alternative to full line replacement in the event of need.


    Water Heater Issues

    The majority of water heater issues such as sediment buildup should be handled by a professional. Repairs that are not done correctly can make the problem worse and could void warranties. Technicians are equipped with special tools for flushing tanks, clearing obstructions in the intake, change valves for control, and much more. Do not attempt to make your own complicated parts for your water heater.


    Know Your Limits

    Remember that plumbing systems are intricate, that include a variety of pipelines, valves, tanks, and connections. If you attempt to repair plumbing without the right expertise, you can lead to time wasted, larger issues or even injuries.


    Conclusion

    Make use of common sense when deciding on what you can safely handle and what needs the expertise of a professional plumber. Be aware of your limitations and ensure safety is your top priority.


  • Why Experience Matters: Choosing The Right Pipe Relining Professionals

    Why Experience Matters: Choosing The Right Pipe Relining Professionals

    Over time, underground sewer and water pipes can start to leak or clog up. Repiping an entire pipe system can be really messy and expensive. A great solution is trenchless pipe relining. This article explains what pipe relining is and why you need an experienced choosing pipe relining sydney professionals like thereliningcompany.com.au to do it right.


    What is Pipe Relining?

    Pipe relining can be a method to fix pipes, without digging. A lining that is flexible is put into the pipe. It binds strongly to the walls. This prevents leaks and lessens obstructions. The pipe stays underground which means that landscaping doesn’t need to be ripped up. Relining is far less costly than traditional pipe repiping.

    Relining of pipes involves exact cleaning of the pipe, video inspection, and liner installation. Having experienced trenchless pipe experts is crucial to achieving the success. This is how their expertise can make an impact.


    Thorough Cleaning is Crucial

    The first step of relining is to thoroughly clean the old pipe. Experts use specialized equipment with pressure water jets. This blasts away any dirt, grease, roots or debris. If the old pipe walls aren’t cleaned really well, the new lining won’t adhere right. An improper bond means leaks could happen again down the road. Only pros with high-power jet cleaners and skills know how to clean correctly for optimal adhesion. Doing this properly paves the way for long-term results.


    Inspection Experience Matters

    After cleaning the area, video cameras are sent further down the line to examine the entire process carefully. The company must use videos from multiple perspectives to ensure complete transparency. Professionally trained technicians know what problems to be looking for. They can identify problems areas, such as holes, cracks or sections that have collapsed and require repair.

    Inspections thorough enough to spot problems before they cause major issues. Only professionals know the complete state of the line and what to do about it.


    Precision Measurement is Vital

    Indicating the exact length and dimension of the pipes is vital. The new liner has to be designed to perfectly fit. Teams will record exact measurements and angles of the pipe. They will also consider conditions such as offsets, corrosion and so on.

    A careful measurement process makes a liner that is sealed well. A fraction of a millimeter off could result in leaks later on or obstructions. It is crucial to be precise.


    Methodical Installation Process

    The process of fitting the custom-fit liner requires taking care to feed the flexible material into the pipe. The precise equipment and the know-how keep the liner moving in a smooth manner to prevent wrinkles. Once properly in place it is possible to use various methods such as steam, hot water and UV lights to cure the material and make it harder. This binds it to the pipe’s walls.

    The proper tools and careful techniques create a seamless watertight seal to ensure long-term durability. Only professionals possess these crucial installation skills.


    Quality Materials Matter

    High-quality liner materials are built to last a lifetime. Many quality liners come with at least 50-year warranties. The right materials won’t corrode or loosen over time. Ask pros what brand and warranty options they offer. Go with an industry leader.

    Reputable companies only use liner products they trust and back confidently. Materials make a big difference in durability.


    Enhanced with Experience

    No two pipe relining jobs are exactly the same. Each pipe system has its own layout and issues. Experience enhances how problems get addressed. For example, seasoned pros may tweak curing methods or insertion techniques based on past jobs. Their knowledge adds finesse.

    Ask about a company’s number of years doing pipe relining and average staff experience. This shows who really knows their stuff.


    Conclusion 

    You shouldn’t make a mistake with pipe repairs. Finding experts who have proven their expertise reduces the risk of future problems and expenses. Find reliable locally-based trenchless pipe experts. They’re equipped with the right equipment, skills and experience to do the job properly.


  • Home Renovation Ideas That Won’t Go Out Of Style

    Home Renovation Ideas That Won’t Go Out Of Style

    Every homeowner usually has a renovation goal to improve something in their house, but no one wants to go through so much effort (and money) only to change it a few years later! Renovations should stand the test of time for your own sake, as well as the potential for selling your home later on.

    If you’re considering some timeless home renovations that will always look amazing and be functional years later, then check out our tips in this blog post.


    Go for open shelving

    Kitchens are evolving all the time, and the latest trend is eschewing cupboards and instead choosing open shelving. Cupboards have a tendency to get cluttered and messy over the course of many years, but open shelving helps to keep your kitchen tidy and minimalist. After all, do you really need so many plates or mugs?

    Open shelving is not just about showing off your best dishes and decorative items, but it also works on a practical level. Everything you need is right within reach and not hidden at the back of a cupboard, and you’ll find that you can limit the kitchen items and gadgets to the absolute minimum. Sleek marble or rustic wood are two fabulous options for open shelving.


    Walk-in showers

    A common feature found in fancy spas across the world, walk-in showers will always be useful and attractive features of any home. Modern and luxurious, walk-in showers also have a big advantage for future-proofing the home. When getting older, it’s much easier for anyone to walk into the shower, rather than climbing over the edge of the bathtub.

    It can be a major change to anyone not used to such a shower, but when combined with a rain showerhead and modern tiling, you’ll wonder how you ever managed before. Walk-in showers from the likes of GROHE, for example, can create such a lasting bathroom statement that simply won’t go out of style.

    Walk in shower


    Choosing sustainable materials

    Sustainability should be part of your life, in general, such as food and cosmetic items. But you can also be sustainable when making renovations in your home. Bamboo, reclaimed wood, and recycled glass are all great materials that are environmentally friendly and look amazing as the finished product. People are more and more committed to sustainability, so adding these features is a good way to entice buyers if you’re selling your home.


    Hidden storage

    There is a need for cupboards in the kitchen, but it’s best to have hidden storage options such as pull-out pantries that can keep the space efficient and clean. You can also install bigger drawers to place gadgets and appliances in when they are not in use, and hidden cupboards are a fantastic way to conceal the rubbish bin and herbs and spices. Trust us, your kitchen will never be more modernised than with hidden storage choices.


    Don’t ignore statement lighting

    One main light in the kitchen just isn’t going to cut it anymore. These days, improving the personality and practicality of your home involves hanging pendant lights over the sink and installing under-cabinet lights for the countertop.

    These possibilities will simply improve the overall kitchen glow and also aid in tasks like cutting vegetables and washing dishes with more directed illumination. Plus, sconces in matte black or brass next to the bathroom mirror are never a bad idea.

    It’s wise never to fall into the trend trap, but think long-term when making home renovations. Every room in the house, but especially the kitchen and bathroom, will benefit from upgrades that will still be efficient and stylish many years later.


  • 10 Traits Of A Good Home Builder

    10 Traits Of A Good Home Builder

    Building a new home is a huge project. You want to find a home builder you can trust to get the job done right. But with so many builders to choose from, how do you pick? This article will cover signs of a trusted home builder through the top 10 traits to look for in choosing an excellent home builder like Vision Homes


    Strong Reputation for Quality

    The most important thing to look for in a builder is their reputation for high-quality work. A builder who is dedicated to excellence will be proud of their workmanship. Ask your trusted relatives, friends, realtors, or coworkers to recommend builders in your neighborhood. Review sites online to read reviews from previous customers, as well.

    Select a builder who has an established track record of happy homeowners who are raving about their work. This indicates they have the ability to build an amazing home that you will be delighted with.


    Extensive Construction Experience

    Find a builder who has many years of experience in the industry to their credit. This shows a deep understanding of the best construction methods. A skilled builder has dealt with every kind of construction challenge through the many years. They are able to steer clear of problems and manage them smoothly when they arise. Their experience ensures that your project remains on the right track.

    Find out the length of time the building company has been around and the number of houses they’ve built. Volume and longevity are both good indicators of competence.


    Strong Communication Skills

    A clear communication channel is crucial in the process of building your home. The builder needs to take your concerns into consideration, discuss options and keep you informed of developments. You should ensure that they communicate regularly via email, phone as well as in person. Be sure to get prompt, clear updates on the project from them.

    Communication is key to avoiding disappointments and unexpected surprises during construction. It also helps the construction process run more smoothly.


    Attention to Detail

    A professional home builder of the highest quality is attentive to every aspect of building. They pay attention to the quality of their work from beginning to end. Choose a builder that is sure to double check the measurements, materials, and workmanship throughout the process. They must inspect all work to make sure everything is in order.

    This eye for fine details creates a well-crafted home that is built to withstand the years. It will save you from repairs later on.


    Knowledge of Regulations

    A knowledgeable home builder understands all local permits and building codes to the letter. They make sure that your house is built to the highest standards for your local area. Find out if they’re up-to-date on the changing regulations and new techniques for building. Knowledge of laws and codes is vital.

    A home that is properly licensed can help you avoid problems with compliance and any future real property transactions.


    Efficiency in Cost and Time

    Good home builders have processes to finish projects on time and on budget. You should look for practices that are efficient, such as:

    • Bulk ordering of materials is recommended in advance
    • Keeping subcontractors on task with deadlines
    • Utilizing checklists and reminders in order to make sure you do not miss steps

    You’d like your home to be built quickly, but correctly. The efficiency of a home is balanced by the care it requires.


    Good relations with subcontractors

    Home builders collaborate with a wide range of subcontractors, including plumbers, electricians, roofing contractors, etc. Be sure that they have solid relationships with subcontractors of high quality. This solid network can help projects to run smoothly. The construction company can call on reliable subcontractors they’ve worked with for a long time.

    Find out how they choose subcontractors and inquire about their working relationships. Continuity can help you get the most efficient work.


    Clean and Organized Job Sites

    A professional builder will keep his work sites clean and organized. The result is professionalism as well as respect for your property. Clean, safe storage of materials, tidy paths and clean floors indicate the efficiency of your home as well. Clean the area of any waste regularly.

    Request to see pictures or visit any of their current construction websites. Clean sites are an indicator of high-quality.


    Responsive Communication

    From inquiries to modifications to issues, the contractor must respond quickly and communicate. Find references and ask if they have been quick to respond. Check if they have online systems, such as project portals and email alerts for easy communication.

    Responsiveness reduces delays plus keeps you informed. It’s a sign that they are focused on the satisfaction of their customers.


    Financial Stability

    Find out about the builder’s financial performance. Check to see if they’re financially sound and able to complete your project to the point of. Find out how long they’ve been in business, and their amount of projects completed and other sources such as the Better Business Bureau for key indicators of financial health.

    Be wary of builders with warning signs such as frequent lawsuits in the past, incomplete projects, or bankruptcy filings. Select security.


    Final word

    Check out this list of the best traits to identify the right builder to surpass your expectations. The importance of quality workmanship as well as experience and communication are key factors in a successful home build.


  • How to Establish a Successful Home-Based Business Concept

    How to Establish a Successful Home-Based Business Concept

    The world has changed a great deal in the past five years. The undeniable impacts of COVID-19 are amongst the most visible, as the working world was near-completely forced into adopting work-from-home and virtual collaboration initiatives. These capabilities were by no means new, but their global utility paved the way for a new world of hybrid working and ignited the spark of possibility in many an entrepreneur’s mind.

    A good business doesn’t necessarily require commercial or industrial premises to succeed. An excellent idea, executed well, can be executed at home – creating a new world of potential for prospective business leaders like yourself. But how can you leverage the possibility of running a business from home? And what considerations do you need to make accordingly?


    1. Develop a Viable Business Idea

    Every good business starts, of course, with a good idea. You may already have a good idea for your next business pursuit, but before you proceed you should ask yourself some key questions. First, does your business idea aligns with your skills? Secondly, does it align with your interests? And thirdly, does it align with market demand?


    1. Research Your Market

    That last point is the one which requires the most time investment. Before a penny is spent on the formulation of your new business concept, you need to spend some serious time researching your business idea’s place in the wider market – both geographically and industrially. Fundamentally, will there be an audience for your product, and is there a compelling enough reason for said audience to abandon similar products on the market?

    You will also find it beneficial to research your competition a little more thoroughly, as well as to ascertain what customers value in both product and service. The latter consideration is key for any remote business, as customer contact will only ever be somewhat second-hand in nature. Something as simple as offering next-day delivery can have dramatic impacts for the success of your service over others.


    1. Understand Legal and Regulatory Requirements

    There are some regulatory challenges that may present in running your at-home business, dependent on the nature of your business and on your home living situation. In short, and dependent on your situation, you may need permissions from your mortgage provider, landlord, or local council to run a business from home – and may need to factor in business rates too.


    1. Set Up an Efficient Home Workspace

    The final piece of the puzzle, ahead of officially incorporating your business and undertaking the necessary marketing, is to create a dedicated workspace in your home that can guarantee productivity and keep your business activities separate from your personal life. If you have a spare room available, you should consider turning this into your base of operations; even just investing in a good desk, some ambient lighting and a filing cabinet can be enough for you to properly start your business.


  • Floorcare Hygiene: Essential for Health and Safety

    Floorcare Hygiene: Essential for Health and Safety

    Floorcare hygiene plays a critical role in maintaining a safe and healthy environment. Clean floors significantly reduce the risk of accidents, illnesses, and the spread of harmful bacteria and viruses. Regular cleaning and maintenance of flooring not only enhance the aesthetic appeal of a space but also contribute to the overall well-being of its occupants.

    Many people underestimate the impact of floor hygiene on health and safety. Contaminated floors can harbor allergens and pathogens that pose serious threats, especially in high-traffic areas. By focusing on proper cleaning techniques and products, individuals and businesses can create a more hygienic setting that safeguards against potential health risks.

    Attention to floorcare also reflects a commitment to quality and professionalism. Clean, well-maintained floors can improve customer perception and employee morale. With health and safety at stake, understanding the importance of floorcare hygiene is crucial for any environment.


    The Impact of Clean Floors on Health

    Maintaining clean floors plays a crucial role in promoting health and safety. Clean environments reduce the risk of illness and contribute to overall well-being.


    Reduction of Pathogens

    Clean floors are essential for minimizing the presence of pathogens. Dirt, dust, and moisture can harbor bacteria and viruses, which thrive in unclean conditions. Regular cleaning, including sweeping and mopping, helps to eliminate these harmful microorganisms.

    Using disinfectants effectively targets specific pathogens, reducing their prevalence significantly. Floors in high-traffic areas, such as hospitals or schools, are particularly susceptible to contamination. Therefore, frequent cleaning routines are critical in such settings.

    Creating a cleaning schedule ensures that floors remain sanitized and safe for all who walk on them. This consistent approach can help prevent the spread of infections.


    Prevention of Allergies and Irritants

    Dirty floors can trigger allergies and exacerbate respiratory issues. Dust mites, pet dander, and mold can accumulate on surfaces, contributing to poor indoor air quality. Regular cleaning helps to remove these allergens.

    Vacuuming with high-efficiency particulate air (HEPA) filters can capture fine particles that regular cleaning may miss. Additionally, using appropriate floor materials can further mitigate irritants. For instance, hard surfaces tend to trap less dust compared to carpet.

    Maintaining clean floors is particularly important in homes with allergy sufferers. A proactive approach to floor cleanliness can significantly enhance comfort and health for residents.


    Importance of Disinfection

    Disinfection goes beyond mere cleaning. It involves using agents that kill germs and prevent their growth on surfaces. Floors, particularly in communal spaces, are often exposed to high levels of contaminants.

    Choosing the right disinfectant is vital for effectiveness. Products must be suitable for the type of flooring while being safe for users. A systematic approach to disinfection should include guidelines for frequency and application methods.

    The impact of proper disinfection is profound. It not only helps maintain a clean appearance but also reduces the likelihood of outbreaks, ensuring a healthier environment for everyone.


    Safety Benefits of Maintaining Clean Floors

    Clean floors contribute significantly to a safe environment by minimizing hazards and enhancing overall health. Maintaining proper flooring hygiene can prevent accidents, reduce contaminants, and improve visibility, directly impacting safety.


    Slip, Trip, and Fall Prevention

    Slips, trips, and falls are common accidents that can lead to serious injuries. Dirt, spills, and debris on floors increase the risk of these incidents. Regular cleaning ensures that surfaces remain free from hazards.

    Using the right cleaning methods also helps in choosing appropriate flooring materials that offer better traction. Mats, rugs, and nonslip coatings can further enhance safety. By investing in proper floorcare, organizations can protect both employees and visitors from preventable injuries.


    Improving Indoor Air Quality

    Indoor air quality plays a crucial role in the overall health of individuals within a space. Dust, allergens, and other contaminants settle on floors and can be disturbed, becoming airborne. Regular cleaning minimizes dust accumulation, leading to a healthier environment.

    Vacuuming and mopping not only remove visible dirt but also reduce irritants that can cause respiratory issues. Utilizing HEPA filters in vacuum cleaners can capture smaller particles, improving air quality further. Clean floors are essential for maintaining a safe and breathable indoor atmosphere.


    Enhancing Visibility and Lighting

    Clean floors contribute to better visibility and lighting in both residential and commercial environments. Dirt and stains can create distractions and dim lighting, hindering one’s ability to navigate safely.

    Regular maintenance helps surfaces reflect light more effectively, leading to brighter spaces. This is particularly important in areas with limited natural light. Good visibility decreases the likelihood of accidents, allowing individuals to move freely and safely within a space.


    Best Practices in Floorcare Hygiene

    Maintaining clean floors requires specific methods and tools. Effective techniques, appropriate products, and strategies tailored for high-traffic areas contribute to optimal floorcare hygiene.


    Routine Cleaning Techniques

    Regular cleaning is critical for maintaining floor hygiene. Daily sweeping or vacuuming removes dirt and debris. This action prevents particles from embedding into the flooring surface.

    Mopping should occur at least once a week, using a suitable solution for the floor type. For surfaces like tile or laminate, a neutral pH cleaner is ideal.

    Spot cleaning is crucial for spills. Addressing them promptly minimizes staining and reduces the spread of germs. Microfiber mops or cloths are effective for this task, as they capture dust and bacteria more efficiently than traditional materials.


    Choosing the Right Cleaning Products

    Selecting the appropriate cleaning products ensures both effectiveness and safety. Look for EPA-approved disinfectants that target a wide range of pathogens, including viruses and bacteria.

    It’s vital to check compatibility with the flooring material. Products meant for hardwood may not be suitable for vinyl or tile.

    Consider using environmentally friendly or biodegradable products to minimize ecological impact. Reading labels for ingredients can help identify safer alternatives.

    Concentration and application matter as well. Following manufacturer instructions ensures maximum efficacy and reduces risks of damage.


    Strategies for High-Traffic Areas

    High-traffic zones require more rigorous cleaning schedules. Implementing a daily cleaning routine can significantly reduce dirt accumulation.

    Using entrance matting can trap moisture and debris before it reaches the flooring. Placing mats both inside and outside entrances adds an extra layer of protection.

    Regular inspections for signs of wear or damage are essential. This helps address issues before they escalate, reinforcing safety and hygiene.

    Consider using color-coded tools for different areas to avoid cross-contamination. This method maintains cleanliness and reduces the risk of spreading pathogens.


  • The Statement Pieces That Will Elevate Your Interiors

    The Statement Pieces That Will Elevate Your Interiors

    If you’re going to get the best from your interior, then it’s important to develop a sense of visual hierarchy. This compositional principle will allow you to avoid the sense of visual chaos and noise that comes with having many different objects vying for attention.

    At the top of the hierarchy, of course, are so-called ‘statement’ pieces. These are the things that demand attention from the moment you step into the room. It’s around these items that you can design the rest of your décor. But exactly which items might you consider as ‘statement’ pieces? Let’s take a look at a few worthwhile options.


    Bold Corner Sofas

    Corner sofas have the advantage of making the best possible use of limited space. A good one will sit right in the corner of the room – a space that might otherwise be difficult to make good use of. But the sheer size of a corner sofa also makes them a natural centrepiece.

    To get the best from your corner sofa, you might make use of rich colours and fabrics. This might mean pairing the furniture itself with a suitably eye-catching throw. Experiment with a few different options and see which works best alongside the surrounding décor.


    Statement Wallpapers or Bold Colour Accents

    Certain sections of the wall can be used to create a visual statement. This can be particularly powerful when the wall in question is contrasted against the sort of pastel-shaded, muted tones that many homeowners prefer. Wallpaper is another great way to create visual interest. An intricate pattern will naturally draw the eye – and you can take advantage of this by hanging other decorations, like paintings and family photographs, in the area around the wall in question. You might echo the same colours or patterns elsewhere in the room, too, with the help of cushions, throws, and other decorative items.


    Oversized Artwork

    Of course, you can make a statement more directly with the help of a choice piece of artwork. Generally speaking, a larger piece will do this job effectively – but you can also draw attention through the use of contrast, and with certain kinds of attention-grabbing imagery. This might be a portrait, or it might be something more abstract. When it comes to art, your personal taste is key. Think also about how you’re going to be framing your art, however: there’s no point in spending big on an amazing painting if it isn’t going to be framed nicely.


    Unique Lighting Fixtures

    When you’re designing the space, the lighting might play a critical role in highlighting certain areas, relegating ugly shadows, and generally bringing everything together. But lighting can also serve a decorative purpose of its own, especially if you pick out the right eye-catching fixtures. Chandeliers and industrial-style festoon bulbs can be effective in different ways.


    Vintage Rugs

    If your living space is feeling a little bit sterile, then you can create an immediate sense of warmth and texture with the help of the right vintage rug. You can often find great rugs in charity shops and other budget-friendly retailers, so don’t be afraid to shop around.


    Antique Mirrors

    Finally, it’s worth mentioning the visual appeal of a large mirror. Antique mirrors can often add a sense of history and grandeur to a room, especially if the frame is ornate. Remember, this is a focal point – so you’re allowed to be a little showy.

    When choosing your statement pieces, it’s important to pay attention to your own personal tastes, as well as the basic principles of design. After all, it’s you that’s going to be living in the space! Think about your priorities, and try to avoid having several different statement pieces competing for attention.

  • Interior Design Hacks: How to Make Any Room Look Luxurious

    Interior Design Hacks: How to Make Any Room Look Luxurious

    Creating a luxurious space doesn’t always require a complete renovation or expensive furniture. Sometimes, it’s the subtle details that can transform an ordinary room into something extraordinary. Whether you’re looking to upgrade your living room, bedroom, or even a small study, a few strategic changes can elevate the overall vibe of any room. From choosing the right colour palette to incorporating textured accents, several interior design hacks can make a room look and feel opulent without breaking the bank. In this blog post, we will explore some of the most effective tricks to add that luxurious touch to your home.


    Choose a Sophisticated Colour Scheme

    The foundation of any luxurious room begins with the right colour palette. Opt for colours that evoke a sense of calm and richness. Shades like deep navy, charcoal, emerald green, and muted gold can add depth and elegance to any space. If you prefer lighter tones, go for soft neutrals like warm whites, beiges, or light greys. These colours not only create an airy and sophisticated ambiance but also serve as the perfect backdrop for adding other luxurious elements like art pieces or bold accent furniture. Pairing your wall colour with luxurious finishes like matte or satin paint can enhance the opulence of the room.


    Investing in Professional Renovation Services

    When it comes to home renovations, investing in professional services can make all the difference. Professionals from a renovation company Perth, for example, bring expertise, experience, and specialised skills that ensure your project is completed efficiently and to the highest standards. They can also help you avoid common pitfalls, saving you time and money in the long run. From design concepts to the final touches, hiring experts ensures your vision is realised, and your home value is enhanced. Whether it’s a simple update or a major overhaul, professional renovators provide quality that DIY projects often can’t match.


    Invest in Quality Textiles

    One of the easiest and most cost-effective ways to add luxury to a room is through textiles. Fabrics like velvet, silk, and high-thread-count cotton can instantly make a space feel more upscale. Throw pillows, blankets, and curtains in these luxurious materials can elevate your living room or bedroom. For example, draping a set of plush velvet curtains can make a room feel more elegant while also improving the room’s acoustics. Similarly, a luxurious silk or satin throw blanket across a bed or sofa will bring instant sophistication and comfort. Don’t forget about the importance of a high-quality rug – a beautifully patterned or solid-toned rug underfoot can anchor the space and add warmth.


    Add Layered Lighting

    Lighting is one of the most crucial aspects of interior design that often gets overlooked. To make any room look luxurious, focus on layering different types of lighting – ambient, task, and accent. A stunning chandelier or pendant light in a luxurious material like crystal, brass, or gold can serve as both functional and decorative. Pair this with strategically placed floor lamps, table lamps, and accent lights that highlight artwork or architectural features. Lighting not only illuminates the space but can also set the mood, making the room feel warm, inviting, and elegant. Dimmable lights can also give you control over the ambiance, allowing you to switch from a bright and lively setting to a more intimate, cosy atmosphere.


    By following these simple interior design hacks, you can easily elevate any room to look luxurious without the need for expensive renovations. With a focus on rich colour schemes, quality textiles, statement furniture, layered lighting, and thoughtful accessories, you can transform your space into a sophisticated haven that feels both comfortable and opulent. Whether you’re working with a small room or an expansive living area, these tips will help you create an environment that exudes luxury and style.


  • How Custom-Made Furniture Maximizes Comfort and Style in Your Home

    How Custom-Made Furniture Maximizes Comfort and Style in Your Home

    Furniture plays a central role in transforming a house into a home. Custom-made furniture, in particular, offers the unique advantage of merging comfort with personal style, providing a solution that mass-produced furniture often lacks. Whether you’re looking to furnish a living room, bedroom, or home office, custom pieces can be tailored to meet both your aesthetic preferences and functional needs. This blog explores how custom-made furniture can elevate your living space by maximizing comfort and enhancing the overall style of your home.


    Tailored to Your Space

    One of the key benefits of custom-made furniture is that it can be designed specifically for your space. Unlike standard furniture, which is made in a limited number of sizes and shapes, custom pieces are built to fit your room’s dimensions. This is particularly helpful in homes with awkward layouts, irregular room shapes, or specific architectural features that may not accommodate traditional furniture easily. With custom designs, you can ensure that every piece fits perfectly, making the most out of your available space without compromising on style or comfort.


    Designed for Your Lifestyle

    Custom-made furniture allows you to create pieces that are not only beautiful but also practical and functional for your lifestyle. Whether you need a sofa that suits your family’s specific seating needs, a bed designed to provide optimal comfort, or a dining table that accommodates large gatherings, custom furniture can be designed with your everyday routines in mind. You can select materials, finishes, and layouts that reflect how you live, ensuring your furniture serves your needs while adding to the overall decor of your home.


    High-Quality Materials

    When investing in custom-made furniture, the quality of materials is paramount. Choosing high-quality fabrics, woods, and metals ensures that each piece not only looks stunning but also lasts for years. For example, custom replacement cushions can be crafted from premium materials, offering superior comfort and durability compared to standard options. This attention to detail elevates the overall aesthetic and functionality of the furniture. Whether you opt for luxurious leather, sustainable wood, or soft, resilient fabrics, the right materials contribute significantly to the comfort and longevity of custom furniture.


    Reflects Your Unique Style

    Custom-made furniture provides an opportunity to showcase your unique sense of style in every room of your home. From contemporary to traditional, minimalist to eclectic, the design possibilities are endless when you work with a skilled furniture maker. You can choose from a variety of styles, colors, and textures, allowing your furniture to be a true reflection of your personality and taste. Whether you want to create a statement piece or complement existing decor, custom furniture can seamlessly blend with your home’s overall aesthetic.


    Eco-Friendly Options

    Many people are becoming increasingly conscious of the environmental impact of their purchases, and custom-made furniture offers an eco-friendly solution. When you opt for locally sourced materials and choose to work with artisans who prioritize sustainable practices, custom furniture can reduce waste and carbon footprints. The durability and timeless quality of custom pieces mean they are less likely to end up in a landfill, contributing to a more sustainable way of living.

    Custom-made furniture is a game-changer for homeowners looking to enhance both the comfort and style of their living spaces. By providing tailored solutions that reflect your unique needs and preferences, custom pieces offer a level of personalization that mass-produced furniture cannot match. Whether you’re working with a small space, seeking functional designs, or aiming to create a home that truly reflects your style, custom furniture elevates the overall experience of your home, offering both beauty and practicality for years to come.

  • 4 Smart Ways to Secure Your Home

    4 Smart Ways to Secure Your Home

    Home is where we feel safest, but it’s also a place that can be vulnerable to threats. Whether it’s theft, vandalism, or natural disasters, securing your home is essential for peace of mind and the safety of your loved ones. With the rise of smart technologies and modern solutions, home security has evolved beyond traditional locks and alarm systems. Today, there are a range of tools and strategies to make sure your home is as secure as possible. In this post, we’ll explore four smart ways you can secure your home and keep potential intruders at bay.


    Reinforce Doors and Windows

    Reinforcing your doors and windows is one of the most effective ways to secure your home. It’s important to start with your exterior doors, ensuring they are made from solid materials such as steel or solid wood. Installing high-quality deadbolts can make it much more difficult for intruders to break in. Windows are often a weak point in home security, so consider adding window locks or shatterproof glass to enhance their strength. For added protection, security screen doors in Perth have become a popular option for homeowners looking to reinforce entry points. These doors not only provide an extra layer of defense against intruders but also allow for better ventilation without compromising security. 


    Upgrade to Smart Security Systems

    A traditional security system isn’t enough to keep your home fully protected. Smart security systems provide a comprehensive approach to safeguarding your home. These systems come equipped with motion sensors, cameras, doorbell systems, and advanced features like facial recognition, all of which can be controlled from your smartphone. Remote monitoring allows you to access live footage, arm or disarm the system, and receive real-time alerts about suspicious activity no matter where you are. Some systems offer cloud storage, so you can easily review footage if necessary. With smart security, your home’s defense is just a few taps away, ensuring you’re always connected and informed.


    Install Motion-Sensor Lighting

    Lighting is a simple yet effective way to deter intruders and increase home security. Motion-sensor lights automatically illuminate when they detect movement, ensuring that your yard is well-lit, especially around entry points like doors and windows. This sudden burst of light not only makes it harder for burglars to approach unnoticed but also provides added visibility, reducing the likelihood of accidents in the dark. Installing motion-sensor lights around your home can be an easy and affordable upgrade to enhance both security and convenience. Whether you’re arriving home late or just walking outside, motion-sensor lighting ensures you always have a well-lit environment without the need for constant manual control.


    Use Neighborhood Watch and Community Apps

    Securing your home isn’t just about technology—it’s also about community. Neighborhood watch programs and community apps have become essential tools for enhancing local safety. These programs enable residents to look out for each other, share information, and report suspicious activities. Community apps take it a step further by offering real-time crime alerts, helping you stay updated on local incidents. Some apps even allow you to connect your security cameras to the community’s network, making it easier to spot and address unusual behavior. Being an active part of a neighborhood watch program or using apps dedicated to security helps create a safer, more aware environment for everyone involved.

    Securing your home requires a balanced approach that combines both technology and traditional safety measures. Smart security systems, motion-sensor lighting, reinforced doors and windows, and community watch programs all play a crucial role in creating a safe environment. By adopting these four smart strategies, you can drastically improve your home’s protection and peace of mind. Today’s security solutions are more advanced than ever, and they offer homeowners the opportunity to be proactive in safeguarding their homes. No matter where you live, these measures will help reduce the risk of break-ins and ensure your loved ones are always safe and protected within your home.

  • The Ultimate Guide to Safe Home Wiring and Maintenance

    The Ultimate Guide to Safe Home Wiring and Maintenance

    Ensuring the safety and efficiency of your home’s electrical system is paramount for the well-being of its occupants. Electricity powers nearly every aspect of modern life, from lighting and appliances to heating and entertainment systems. However, when not managed properly, it poses significant risks such as electrical fires, shocks, and equipment damage. Proper wiring and regular maintenance not only prevent these potential hazards but also enhance the longevity and performance of your electrical appliances, ensuring that your home remains a safe and comfortable place to live. This comprehensive guide delves into essential aspects of safe home wiring and maintenance, providing homeowners with valuable insights to uphold electrical safety standards, reduce energy costs, and maintain the integrity of their property.


    Understanding Your Home’s Electrical System

    A home’s electrical system comprises various components working in unison to distribute power safely. Central to this system is the service panel, often referred to as the breaker box, which allocates electricity to different circuits throughout the house. Each circuit consists of conductors: one delivering current to outlets and appliances, and another returning it to the service panel. Modern homes typically feature a grounded electrical system, incorporating a third wire connected to all outlets and metal boxes, which directs excess electricity safely into the earth, thereby mitigating shock risks. Understanding how these components interact helps homeowners identify potential issues and communicate effectively with electricians when needed.


    Common Wiring Issues and Their Implications

    Over time, electrical systems can develop issues that compromise safety and functionality. Outdated wiring, for instance, may not meet current safety standards, increasing the risk of electrical fires. Faulty outlets or switches can lead to inconsistent power delivery or pose shock hazards. Overloaded circuits, resulting from connecting too many devices to a single circuit, can cause breakers to trip or wires to overheat. Regular inspections can identify these problems early, allowing for timely interventions to prevent accidents. Recognizing the signs of electrical issues—such as buzzing sounds, flickering lights, or warm outlets—is crucial for maintaining a safe home environment. 


    The Importance of Regular Electrical Inspections

    Scheduling routine electrical inspections is a proactive measure to ensure your system remains in optimal condition. A qualified electrician can assess the integrity of your wiring, verify that all components comply with current codes, and identify potential hazards before they escalate. These inspections are particularly crucial in older homes, where wiring may have deteriorated or become obsolete. Regular assessments can uncover hidden dangers, such as frayed wires or corroded connections, that might otherwise go unnoticed. By addressing issues promptly, homeowners can prevent costly repairs, minimize downtime due to electrical failures, and enhance overall safety.


    Best Practices for Safe Home Wiring

    Adhering to best practices in home wiring significantly reduces the risk of electrical mishaps. Ensure that all wiring installations conform to local building codes and standards. Utilize appropriate wire types and gauges suited to the specific electrical load of each circuit. Properly grounding your electrical system is essential to prevent shock hazards. Additionally, installing Ground-Fault Circuit Interrupters (GFCIs) in moisture-prone areas like kitchens and bathrooms can avert potential electrocutions. Labeling circuits clearly, avoiding the overuse of extension cords, and ensuring that outlets are not overloaded are additional measures that contribute to a safer electrical environment.


    DIY vs. Professional Electrical Work

    While minor tasks such as replacing a light bulb or resetting a tripped breaker can be safely performed by homeowners, more complex electrical work should be left to professionals. Attempting DIY electrical projects without adequate knowledge can lead to serious injuries, fires, or code violations. Electrical work often involves risks that are not immediately apparent, such as hidden wiring or load imbalances. Hiring a licensed electrician ensures that installations and repairs are executed correctly, adhering to safety regulations and minimizing risks. Professionals have the training to diagnose problems accurately, use specialized tools, and apply the latest safety standards, which provides peace of mind and long-term reliability.


    Selecting the Right Professional for Electrical Maintenance

    Choosing a qualified electrician is crucial for effective electrical maintenance. Look for professionals with proper licensing, insurance, and positive references. For residents seeking services from an electrician Brisbane Northside, it’s advisable to select a local expert familiar with regional codes and standards. A reputable electrician will provide transparent pricing, and detailed assessments, and prioritize safety in all procedures. Building a relationship with a trusted electrician can ensure timely support during emergencies and consistent quality for ongoing maintenance needs. 

    When selecting an electrician, it’s also beneficial to assess their experience with projects similar to yours, as this ensures they possess the necessary expertise to handle your specific needs. Additionally, clear communication is essential; a professional who listens to your concerns and explains the work process fosters trust and transparency. Finally, consider the electrician’s availability and response time, especially for emergencies, to ensure timely support when it’s most needed.


    Energy Efficiency and Your Electrical System

    Enhancing the energy efficiency of your home’s electrical system not only reduces utility bills but also lessens the strain on your wiring. Upgrading to energy-efficient appliances, using LED lighting, and ensuring proper insulation can contribute to a more efficient system. Smart home technologies, such as programmable thermostats and energy monitoring devices, allow homeowners to optimize energy consumption. Regular maintenance, such as tightening loose connections, cleaning components, and inspecting insulation, also plays a role in sustaining efficiency. Efficient systems generate less heat, reducing the risk of overheating and extending the lifespan of electrical components.


    Recognizing When to Upgrade Your Wiring

    Certain signs indicate that it’s time to consider upgrading your home’s wiring. Frequent circuit breaker trips, dimming or flickering lights, discolored outlets, or a persistent burning smell are red flags. Homes over 40 years old may have wiring that doesn’t meet current safety standards, such as aluminum wiring or outdated knob-and-tube systems. Upgrading wiring enhances safety, accommodates modern electrical demands, and can increase property value. It also ensures compatibility with contemporary appliances and technologies, reducing the risk of electrical faults and improving energy efficiency.

    Maintaining your home’s electrical system is a continuous responsibility that demands attention and care. An efficient, well-maintained electrical system is fundamental not only to the functionality of your home but also to the safety of everyone who lives there. By understanding its components, recognizing potential issues, and engaging qualified professionals for inspections and repairs, homeowners can ensure a safe and efficient living environment. Proactive maintenance not only safeguards your property from potential hazards like fires and electrical shocks but also provides peace of mind, knowing that your electrical system is reliable, up-to-date, and capable of supporting your household’s energy needs. Investing in regular inspections, timely upgrades, and professional services is an investment in your family’s safety and the long-term value of your home.


  • Plan7Architect Pro 2025 Review – A Personal Journey Through Design Innovation

    Plan7Architect Pro 2025 Review – A Personal Journey Through Design Innovation

    Plan7Architect Pro 2025 is an advanced design tool built for architects, interior designers, and private homeowners alike. My hands-on experience with the software has given me a detailed insight into its capabilities, strengths, and some areas where it could be improved. This review covers every aspect of the product—from its intuitive interface and innovative features to its performance in real-world projects.


    Immediate Verdict

    Plan7Architect Pro 3 offers a robust, feature-rich platform that streamlines design and planning tasks, though its premium price might not be suitable for every budget.


    Key Highlights

      • Intuitive, user-friendly interface
      • Extensive 2D and 3D modelling tools
      • Real-time rendering and cloud collaboration
      • Versatility for both professional projects and personal home renovations


    Product Overview

    What is Plan7Architect Pro 3?

    Plan7Architect Pro is a comprehensive design software solution developed to handle everything from basic layouts to complex architectural models. It caters to professionals who require precision as well as to private homeowners planning renovations or new builds.


    Who Is It For?

    • Architects & Interior Designers
      Those looking for a tool that supports detailed blueprints, 3D models, and realistic renderings.
    • Private Homeowners
      Individuals planning renovations, remodelling projects, or new constructions who want to visualise their ideas in detail.
    • DIY Enthusiasts
      Anyone with a passion for design who wishes to experiment with creative layouts and architectural solutions.


    Key Features and Functionalities


    Intuitive Interface and Ease of Use

    • User-Friendly Design
      The clean, uncluttered interface allows users to quickly locate essential tools and start designing immediately.
    • Customisable Workspaces
      Tailor the layout to match your workflow, whether you’re drafting a quick sketch or developing a complex project.


    Advanced Modelling Capabilities

    • 2D & 3D Design Tools
      Create detailed floor plans, elevations, and three-dimensional models with ease.
    • Real-Time Rendering
      Instant visual feedback allows you to see a near-final representation of your design, which is especially useful for adjusting elements on the fly.
    • Dynamic Elements
      Incorporate curves, round walls, and other complex structures effortlessly, thanks to the software’s powerful modelling engine.


    Integration and Collaboration

    • File Compatibility
      Seamlessly import and export various file formats to ensure smooth integration with other design tools.
    • Cloud Collaboration
      Collaborate with team members or contractors in real-time, reducing project turnaround times and enhancing communication.


    Performance Under Real-World Conditions

    • Speed & Responsiveness
      Plan7Architect Pro 3 maintains high performance even when handling large, intricate designs.
    • Reliability
      In my experience, the software has proven stable and dependable during long design sessions, ensuring minimal downtime.
    • Scalability
      Whether you’re working on a simple renovation or a complex new build, the software scales efficiently to meet project demands.


    Detailed Walkthrough of My Experience


    Getting Started

    • Installation and Setup
      The installation process was straightforward, and the quick-start guide provided clear instructions for beginners.
    • First Impressions
      The modern and responsive user interface immediately set a positive tone. The layout is both attractive and highly functional, making navigation intuitive.


    Exploring the Core Features

    • 2D Drafting and 3D Modeling
      I was impressed by how easily I could switch between detailed 2D plans and immersive 3D models. This dual capability is invaluable for visualising design concepts from multiple perspectives.
    • Real-Time Rendering
      The instant preview feature allowed me to experiment with various design elements and immediately see the results, making it easier to finalise layouts and design details.
    • Customisation
      The ability to customise toolbars and workspaces meant that I could adapt the software to suit my personal workflow, which enhanced productivity significantly.


    Practical Application in Projects

    • Home Renovation
      For a recent home renovation project, I used the software to draft precise floor plans, experiment with different wall layouts, and even visualize the final design in 3D. The real-time rendering was particularly helpful in communicating design ideas to contractors.
    • New Construction
      In planning a new build, the detailed 3D models allowed for precise adjustments in structural elements. The ability to integrate various design aspects seamlessly proved crucial in managing the project efficiently.


    Challenges and Areas for Improvement

    • Learning Curve for Advanced Tools
      While the basic functions are very accessible, mastering some of the advanced features does require additional time and practice.
    • Hardware Demands
      For optimal performance, particularly with larger projects, investing in higher-end hardware is recommended.
    • Price Consideration
      At $249 USD or £199 GBP, the premium pricing may be a consideration for budget-conscious users, though the extensive feature set justifies the cost for many.


    User Feedback and Expert Opinions

    • Positive Aspects
      Users consistently praise the software for its ease of use, robust performance, and comprehensive suite of tools. Many have highlighted the real-time rendering and customization options as major benefits.
    • Constructive Criticism
      Some users noted that the advanced functionalities require a steeper learning curve and that the software’s full potential can only be realized with a bit of training.


    Final Thoughts

    Plan7Architect Pro 3 stands out as a versatile and powerful tool for anyone involved in architectural design, be it a professional or a private homeowner. Its robust features, coupled with an intuitive interface, make it a valuable asset for turning design ideas into detailed, workable plans. While it may require an initial investment in both time and money, the benefits it offers can significantly enhance your design and planning process.

    HINT: If you’re embarking on a new construction or renovation project, take the time to explore all the features of Plan7Architect Pro 3. The learning curve is well worth the increased efficiency and clarity it brings to your projects.


  • How Asphalt Paving Offers Cost-Effective Solutions for Residential and Commercial Projects

    How Asphalt Paving Offers Cost-Effective Solutions for Residential and Commercial Projects

    Asphalt paving stands out as a preferred choice for both residential and commercial projects due to its durability, affordability, and quick installation process. Many property owners today weigh the benefits of investing in asphalt over other paving options like concrete or stone. Understanding the advantages of asphalt paving can help homeowners and business proprietors make informed decisions that enhance the value and usability of their properties.


    Understanding the Advantages of Asphalt Paving

    Asphalt paving has been favored for its longevity and performance in various weather conditions. It can withstand heavy traffic loads while providing a smooth surface for vehicles and pedestrians. Additionally, asphalt is known for its flexibility, allowing it to adjust and bear the stresses from temperature changes without cracking, a common issue with concrete surfaces.

    Cost efficiency is another critical advantage. According to the National Asphalt Pavement Association, asphalt is approximately 20% less expensive to install than concrete. This lower initial cost, combined with the reduced maintenance and repair expenses, leads to significant savings over time for property owners. Furthermore, asphalt’s dark color aids in keeping surfaces free of ice and snow during winter months, thereby enhancing safety and reducing winter maintenance costs.


    Choosing A Local Company

    When selecting a paving company for your asphalt project, choosing a local provider is often beneficial. Local companies are familiar with regional weather patterns, soil conditions, and local regulations, which can significantly impact the performance of your paving. Whether you work with a Michigan asphalt company or one in Boston, local expertise can provide tailored recommendations that enhance the longevity of your investment. Opting for a local contractor often means better communication and faster response times. Establishing a connection with someone in your community can simplify the process of discussing your project’s needs. Local companies are more likely to prioritize customer satisfaction and maintain a solid reputation in their area, as positive word-of-mouth is essential to their business.


    Installation Process: What to Expect

    The installation process for asphalt paving typically involves several stages, ensuring a high-quality surface that lasts for years. Initially, the old surface or existing material is removed, allowing contractors to prepare a solid foundation for the new asphalt. Geological studies may be performed to evaluate soil conditions and drainage issues that could affect the project.

    Once preparations are made, the team applies a layer of hot mix asphalt. This method of heating ensures proper adhesion and durability. After the asphalt is laid, it is compacted to create a smooth, level surface. Once the dimensions and slope are finalized, a sealant is often applied after a curing period to protect against moisture and prolong its lifespan.


    Maintenance Tips for Asphalt Surfaces

    To maximize the longevity of your asphalt surface, regular maintenance is essential. Routine sealing is recommended every two to three years to protect against the elements and prevent cracking. Cleaning the surface of debris and dirt also helps maintain its visual appeal and functionality. Another critical maintenance tip is to promptly repair any cracks or holes as they appear. Neglecting small issues can lead to extensive damage over time, increasing repair costs significantly. 

    Oil spills and fluid leaks from vehicles should be cleaned immediately, as these substances can break down asphalt and lead to deterioration. Ensuring proper drainage around the asphalt surface can prevent water from seeping in and causing structural weaknesses. Avoiding heavy loads or sharp objects, such as motorcycle kickstands or heavy machinery, can also help prevent surface indentations. Lastly, regular inspections can help identify early signs of wear and tear, allowing for timely interventions that extend the life of the pavement.


    Environmental Considerations of Asphalt Paving

    Asphalt is increasingly recognized for its sustainability. Notably, asphalt can be recycled, often reused in new paving projects or road repairs. It has a significant recycling rate of over 80%, benefiting the environment by reducing waste. Many asphalt companies have adopted eco-friendly practices, ensuring a low carbon footprint during production and installation. Advancements in technology have led to the development of warm mix asphalt, which requires lower temperatures for production and reduces energy consumption. This innovation not only minimizes emissions but also contributes to creating safer and better-performing roads.

    Recycled asphalt also helps conserve natural resources by reducing the need for new raw materials like gravel and bitumen. Permeable asphalt options are being developed to improve water drainage and reduce runoff, helping to prevent erosion and manage stormwater more effectively. As sustainability continues to be a priority in construction, asphalt paving remains a viable choice for eco-conscious projects.


    Cost Comparisons: Asphalt vs. Other Paving Options

    When comparing asphalt to other paving materials such as concrete or brick, several factors come into play that highlight its cost advantages. While concrete tends to have a longer lifespan, its initial installation cost is generally higher. Property owners might find asphalt’s lower upfront investment more appealing, especially when considering budget constraints for large-scale projects.

    Further, asphalt paving usually offers faster installation than concrete, allowing property owners to utilize the surface sooner. This efficiency translates into less disruption for residential owners and businesses requiring quick turnarounds. For significant projects, the cumulative costs of downtime can greatly affect profitability, making asphalt a wise investment.


    Long-Term Value of Asphalt Paving

    The long-term value of asphalt paving is undeniable. Properly maintained asphalt can last up to twenty-five years, offering impressive durability and resilience. As previously mentioned, the combination of lower installation costs and reduced maintenance needs creates a favorable total cost of ownership. Asphalt surfaces better accommodate modern needs, including smooth transitions for heavy vehicles and added aesthetics through various finishes. For commercial projects, the curb appeal that asphalt provides can enhance the overall property value, attracting more customers due to its polished appearance.

    Asphalt’s flexibility allows it to withstand temperature fluctuations and shifting ground conditions better than some other materials. Its quick installation and repair times also reduce downtime, making it a cost-effective choice for businesses and municipalities. Over time, the ability to resurface asphalt rather than completely replace it further adds to its economic and practical benefits.

    Ultimately, asphalt paving presents numerous benefits for residential and commercial projects alike. From cost-effectiveness to environmental sustainability, its advantages are significant. By selecting a local provider and committing to regular maintenance, property owners can ensure their investment endures through the years. The combination of performance and affordability makes asphalt the smart choice for paving projects of all kinds.


  • How To Curate Your Wardrobe for Upcoming Social Occasions

    How To Curate Your Wardrobe for Upcoming Social Occasions

    As the social calendar fills up, it’s time to take a look at your wardrobe and ensure you’re prepared for a season of celebrations. Whether it’s a wedding, a gala, or a more casual gathering, having a few key pieces on hand will make navigating dress codes a breeze.


    Assess Your Current Wardrobe

    Before embarking on any shopping sprees, take an honest inventory of your existing wardrobe. Identify gaps. Are you lacking in formal wear? Do you need more versatile pieces that can be dressed up or down? Consider your lifestyle. Do you frequently attend formal events? Or are your social occasions more casual? Evaluate your current pieces. Are there any items that need repairs, alterations, or a good clean? Can any existing pieces be updated with new accessories?


    Invest in Key Pieces

    The Little Black Dress (LBD) is a timeless classic and a versatile piece that can be dressed up or down with the right accessories. A well-cut suit can be a statement piece for both men and women. A versatile jumpsuit offers a stylish and comfortable alternative to a dress. A luxurious silk blouse can elevate any outfit, from jeans to a skirt. Invest in a pair of comfortable heels that you can wear for extended periods without discomfort.


    Accessorise Wisely

    Accessories can transform an ordinary outfit into something extraordinary. A statement necklace or a pair of statement earrings can add instant glamour. Scarves can add a touch of colour and personality to any outfit. An elegant clutch bag is the perfect accessory for evening events.


    Consider Special Occasions

    When attending a wedding, it’s crucial to avoid upstaging the bride. Opt for elegant and flattering wedding guest dresses that are appropriate for the occasion. Avoid wearing white or ivory, and consider the wedding theme and time of day. For black-tie events, opt for floor-length gowns for women and tuxedos for men. For cocktail parties, cocktail dresses, stylish jumpsuits, or elegant separates are appropriate for women. Men can wear a suit and tie, or a blazer with dress pants.


    Embrace Your Personal Style

    While it’s important to adhere to dress codes, remember to express your own unique style. Don’t be afraid to experiment with different looks and find what makes you feel confident and comfortable.

    By following these tips, you can curate a wardrobe that is both stylish and functional, ensuring you’re always prepared for any social occasion that comes your way.


  • 10 Secret Tips for Using Your Hedge Trimmer Like a Pro

    10 Secret Tips for Using Your Hedge Trimmer Like a Pro

    Hedge trimmers are one of those tools that can make a huge difference in keeping your outdoor space neat and tidy. But if you’re not using them correctly, you might end up with uneven cuts, damaged plants, or even safety concerns. Whether you’re new to hedge trimming or looking to refine your skills, these tips will help you get professional-level results every time.

    1.Choose the Right Hedge Trimmer for the Job

    Not all hedge trimmers are created equal. The type of hedge trimmer you choose depends on your hedges and how much trimming you plan to do. For small jobs, a corded electric trimmer is lightweight and easy to use. If you’re tackling larger areas, a battery-powered or gas trimmer might be a better choice. Always consider the blade length—shorter blades are great for precision, while longer blades can handle bigger hedges more efficiently.

    2. Keep Your Blades Sharp

    Dull blades don’t just make the job harder—they can damage your plants by tearing instead of cutting. Check your blades regularly and sharpen them when they start to lose their edge. Clean your blades after each use to remove sap, debris, and dirt, as these can cause rust and reduce their effectiveness over time.

    Quick Tip: Lubricate your blades before each use to keep them running smoothly and prevent wear.

    3. Know When to Trim Your Hedges

    Timing is everything when it comes to hedge trimming. Most hedges benefit from a trim in late spring or early summer, but this varies depending on the type of plant. For example, flowering hedges should be trimmed after they bloom to avoid cutting off buds. Regular maintenance trims can be done throughout the growing season, but avoid heavy trimming in late fall, as it can leave your plants vulnerable to winter damage.

    4. Use the Right Technique

    Proper technique is key to achieving a clean, even look. Always start trimming from the bottom and work your way up. This ensures that cut branches don’t fall into areas you’ve already trimmed. Hold the trimmer steady and move it in smooth, sweeping motions for a consistent cut. Avoid cutting too deep into the hedge—focus on trimming the outer growth to maintain its shape and health.

    Pro Tip: Angle the trimmer slightly toward the hedge to create a slightly tapered shape. This allows sunlight to reach the lower branches and keeps the plant healthy.

    5. Plan Your Shape in Advance

    Before you start trimming, take a step back and visualize the shape you want to achieve. Do you want a flat top, a rounded edge, or something more decorative? Use string or stakes as a guide if you’re aiming for straight lines. Taking a moment to plan can save you time and frustration later on.

    6. Safety First

    Using a hedge trimmer safely is non-negotiable. Always wear protective gear, including gloves, safety glasses, and sturdy footwear. If you’re using a corded trimmer, keep the cord behind you at all times to avoid accidentally cutting it. When working on taller hedges, use a stable ladder and never overreach—it’s better to reposition the ladder than risk losing your balance.

    Remember: Always turn off and unplug your trimmer before clearing jammed branches or performing maintenance.

    7. Take Breaks to Avoid Fatigue

    Trimming hedges can be physically demanding, especially if you’re working on a large area. Take regular breaks to rest your arms and prevent fatigue. This will not only help you work more efficiently but also reduce the risk of accidents caused by tiredness or loss of focus.

    8. Clean Up as You Go

    It might be tempting to leave the cleanup for the end, but tidying up as you go makes the process much easier. Use a rake or tarp to gather trimmed branches and leaves. This keeps your work area clear, reduces the risk of tripping, and makes it easier to see if you’ve missed any spots.

    9. Maintain Your Hedge Trimmer

    Regular maintenance keeps your hedge trimmer in top condition and extends its lifespan. After each use, clean the blades, check for damage, and store the tool in a dry place. For gas-powered trimmers, make sure to follow the manufacturer’s guidelines for fuel storage and engine care. Proper maintenance ensures your trimmer is always ready when you need it.

    10. Practice Makes Perfect

    The more you use your hedge trimmer, the better you’ll get at handling it. Don’t be discouraged if your first few attempts aren’t perfect—mastering the art of hedge trimming takes time and patience. With practice, you’ll develop a steady hand and an eye for detail, making it easier to achieve professional-looking results.

    Master the Art of Hedge Trimming

    Using a hedge trimmer like a pro isn’t just about having the right tools—it’s about understanding the process and applying the right techniques. By following these tips, you’ll not only keep your hedges looking their best but also make the job safer and more enjoyable.


  • Mistakes to Avoid When Choosing MDF Skirting Mouldings

    Mistakes to Avoid When Choosing MDF Skirting Mouldings

    MDF skirting mouldings are a versatile and cost-effective choice for modern homes and renovations. They not only protect your walls but also add a finishing touch that can elevate your interior design. However, selecting the wrong skirting boards or making simple errors during the buying process can result in wasted time, money, and effort. By avoiding these common mistakes, you can make informed decisions that ensure long-lasting results and an impeccable finish. In this blog, we highlight the most common mistakes people make when choosing MDF skirting mouldings and provide helpful tips to help you get it right the first time.

    1. Choosing the Wrong Skirting Height

    One of the most frequent mistakes when selecting MDF mouldings is opting for the wrong height. The size of your skirting board has a significant impact on your room’s overall look and proportions. Taller skirting boards tend to suit rooms with high ceilings, adding grandeur and a traditional feel. However, in rooms with lower ceilings, excessively tall skirting can overwhelm the space and make it appear smaller.

    Solution: Measure the height of your ceilings before purchasing skirting boards. For rooms with lower ceilings, stick to shorter profiles (e.g., 70mm to 120mm), while taller profiles (e.g., 170mm to 220mm) work best in rooms with high ceilings. Matching the proportions of your room will create a balanced and cohesive look.


    2. Ignoring the Style of Your Home

    A common oversight when choosing skirting boards is failing to consider the style of your property. Different skirting moulding designs suit specific interior styles, and a mismatch can disrupt the flow of your design. For example, ornate, decorative mouldings are ideal for traditional or period homes, whereas sleek, simple designs work best in modern, minimalist interiors.

    Solution: Consider your home’s overall design theme before purchasing. If you have a modern property, choose square-edge or pencil-round profiles that create clean lines. For more traditional homes, classic styles like Torus or Ogee add character and elegance. MR Mouldings offers a wide range of styles to complement any home design.


    3. Not Opting for Moisture-Resistant MDF

    Standard MDF is not inherently moisture-resistant, which makes it prone to swelling and damage in damp environments, such as kitchens, bathrooms, and utility rooms. Choosing the wrong type of MDF for these areas can lead to expensive repairs or replacements down the line.

    Solution: Invest in moisture-resistant MDF skirting boards for rooms with high humidity or potential water exposure. Moisture-resistant options ensure durability and longevity, preventing the boards from warping or swelling over time.


    4. Overlooking Pre-Primed Options

    Unprimed skirting boards may seem like a budget-friendly option, but they require more time and effort to prepare for painting. Skipping pre-primed MDF can delay your project and result in a less polished finish, particularly if you’re not confident with DIY.

    Solution: Opt for pre-primed MDF skirting boards. These come with a smooth primer coating, saving you time and providing a professional base for painting. Pre-primed boards are particularly useful if you want a high-quality finish without the added labour.


    5. Not Considering Cable Management

    Unsightly wires and cables can ruin the appearance of an otherwise well-designed room. Many homeowners forget to factor in cable management when choosing skirting mouldings, only to find they have no practical solution for hiding wires.

    Solution: Look for MDF skirting boards that offer built-in cable management grooves. These designs allow you to conceal cables neatly behind the skirting, keeping your interiors tidy and clutter-free.


    6. Failing to Plan for Maintenance

    While MDF skirting mouldings are low-maintenance compared to natural wood, they still require some care. Overly intricate designs can accumulate dust and dirt, making them harder to clean. Homeowners often overlook the practicality of their skirting design when choosing a profile.

    Solution: Choose skirting boards that match your lifestyle. If ease of maintenance is important to you, go for simple designs like square edge or bullnose, which are easier to wipe clean. For decorative profiles, ensure you have the tools and time to keep them looking pristine.


    7. Choosing Low-Quality MDF

    While budget constraints may tempt you to opt for cheaper MDF skirting boards, low-quality MDF can lead to problems in the long run. Cheaper boards are often more susceptible to chipping, damage, or warping, reducing their lifespan and overall quality.

    Solution: Always purchase high-quality MDF skirting mouldings from reputable suppliers, such as MR Mouldings. Investing in quality products ensures durability and provides better value for money over time.


    8. Misjudging the Finish

    The finish of your MDF skirting boards has a big impact on the final look of your interiors. Many people make the mistake of choosing the wrong paint type or finish for their skirting, leading to scuffs, marks, or a finish that doesn’t match the rest of the room.

    Solution: Use durable, high-quality paint in satin, gloss, or semi-gloss finishes, as these are easy to clean and resistant to wear. Always test a small area first to ensure the finish complements your walls and flooring.


    9. Rushing Installation

    Improper installation is one of the biggest mistakes homeowners make. Skipping steps such as measuring accurately, prepping surfaces, or using the correct tools can lead to gaps, misaligned boards, and an unprofessional finish.

    Solution: Take your time with the installation process or hire a professional for the best results. Ensure you measure accurately, use the correct adhesive, and sand any rough edges for a seamless finish.


    10. Forgetting to Factor in Wall Irregularities

    Walls are rarely perfectly straight, especially in older properties. Many people overlook these irregularities when choosing and installing skirting boards, which can result in noticeable gaps or uneven finishes.

    Solution: Before installing your MDF skirting, check your walls for irregularities and plan accordingly. Flexible adhesives can help fill small gaps, while scribing techniques ensure a flush fit against uneven surfaces.


    Conclusion

    Choosing the right MDF skirting mouldings is an essential part of any home improvement or renovation project. By avoiding these common mistakes — such as selecting the wrong height, ignoring moisture resistance, or opting for low-quality materials — you can ensure that your skirting boards enhance your interiors both aesthetically and practically.

    Take the time to consider your room dimensions, design style, and long-term maintenance needs to make an informed decision. For high-quality, durable, and stylish MDF skirting mouldings, explore the extensive range available at MR Mouldings. With the right choices and proper installation, you’ll enjoy beautiful, long-lasting skirting that transforms your home.