
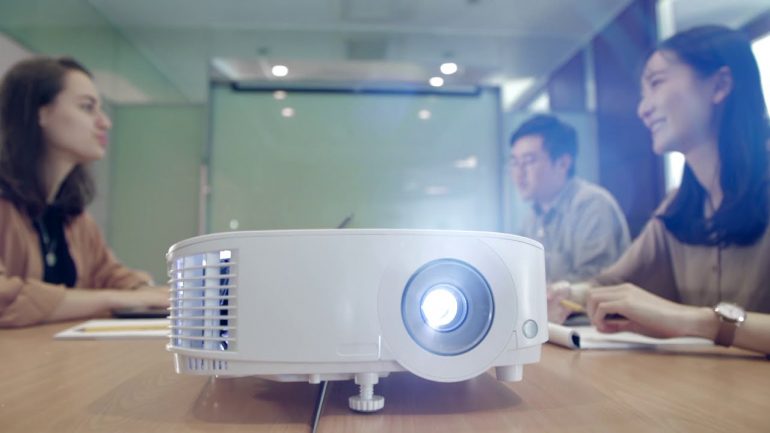
Are you on the lookout for a cost-effective way to take your home entertainment system to the next level? Allowing you to enjoy the thrill of scrolling through your favourite streaming services on a giant screen, using a projector as a television is proving more and more popular.
But how do you get started? Fear not—we’ve got you covered with this detailed step-by-step guide on how to enjoy the lush visuals of a projector TV in your living room without blowing your budget. Let’s dive in!
Quick Insight
To set up your projector as a TV, you will need to connect your TV antenna or other signal source, as well as your sound system and any other necessary cables. Then you will need to set the projector’s settings accordingly for optimal viewing.
Using a projector as a TV can be an affordable and innovative way to get the best video quality without having to invest in an expensive television. While not all projectors are designed for use with a television or in public buildings like churches, certain models can offer a good combination of size and clarity that can meet your public home entertainment needs (why not check out the best projector for church). To properly use a projector as a TV, you’ll need to understand the basics of how projectors work, as well as how to set up the projector and connect it to other devices.
The potential advantages of using a projector as a TV include low cost, dramatic levels of brightness, long lamp life, and easy portability. On the downside, setting up the projector properly can be complicated depending on the model, and if you don’t have the right equipment or computer skills, the process may be daunting. Additionally, some users find the picture quality lacking compared to traditional TVs, especially for dark-room viewing.
By understanding these pros and cons when using a projector as a TV, you can better decide if it is right for you. After this section discussing these precautions, we will move on to setting up your projector in order to receive television signals.
Essential Highlights
Using a projector as a TV can be an affordable and innovative way to get the best video quality without having to invest in an expensive television. It has advantages such as low cost, high levels of brightness, long lamp life, and easy portability. Setting up the projector properly can be complicated depending on the model and some find the picture quality lacking compared to traditional TVs. Knowing the pros and cons is important when deciding if using a projector as a TV is right for you.
Setting Up Your Projector
When setting up a projector as a TV, the first step is to choose the location for the projector. This decision must be based on factors such as room size, lighting, and seating arrangements. If the room is too large, it may be difficult to achieve a large enough picture size. Additionally, if the room has bright windows or recessed lighting, they will provide considerable amounts of ambient light which can affect the projected image’s brightness and clarity. Poorly arranged seating can reduce viewing angles and limit the number of people who can comfortably watch movies or shows on your projector TV.
Once the right location has been determined, it’s time to mount your projector onto or against a wall or ceiling. You’ll need an adjustable projector mount to make sure that you’re able to find the correct angle for the optimal picture. Depending on your setup and space requirements, it might also be necessary to get other accessories like extension poles, additional mounting plates, or risers. Once again, careful planning is required here before making any purchases to ensure that all components fit properly together.
Depending on how much power you want from your projector, it may also be worth investigating hi-fi quality soundbars in addition to more traditional speakers. This way you can create a realistic surround sound experience without compromising clarity.
Once all mounting and positioning is complete, it’s time to connect the projector to your chosen devices via HDMI or VGA cables or through wireless streaming options such as Chromecast or Apple TV AirPlay2. Then you’re ready to enjoy movies, shows and games just like with any other television set!
Now that your projector is set up properly and connected it’s time to move onto becoming familiar with its unique features while exploring possible sources of content. To successfully accomplish this task requires understanding what type of compatible devices are recommended and acquirement of any necessary adapters or cords needed for implementation – topics that will discussed further in the next section about “Requirements and Compatible Devices”.
Requirements and Compatible Devices
Using a projector as a TV is a cost-effective and convenient way to enjoy your favorite shows and movies. However, in order to get the most out of it, you will need to make sure that your device is compatible with the projector.
The first essential requirement is having an HD projector. This means that you will need a 1080p or 2K resolution with good brightness levels which can be achieved through larger lumens, e.g., 4500 ANSI Lumens. This will give you better contrast ratios so that colors appear more vibrant and true-to-life. Additionally, choosing something like an ultra short throw (UST) projector might be best for small spaces if mounting the projector onto the wall isn’t possible.
You will also need to take into account the compatibility of your device with the type of input used by the projector. Most projectors come with one or two HDMI inputs, although there are some which consist of only one VGA connection for devices such as DVD players. In this case, it may be necessary to purchase an adapter or separate cable from your device in order to make it compatible with the projector.
Aside from being able to send video signals to the projector, other factors include resolution, refresh rate, and audio support. These may vary depending on what kind of device or TV stick you’re usingbut generally speaking, most major streaming devices should have no issue meeting these requirements.
One argument against using projectors is that they tend to have slower response times than traditional TVs due to heat buildup inside the unit over time – causing image persisting and ghosting effects while watching darker scenes on video content. However, newer projectors have ways of preventing this issue through advanced cooling systems and auto-calibration modes so this shouldn’t be much of a concern anymore.
All in all, making sure that your projector is compatible with both devices is vitally important for achieving optimal picture quality when using a projector as a TV. With proper setup, you should have no problem enjoying great visuals for years to come! Now let’s move on to connecting your projector in the next section.
Connecting Your Projector
Once you have a compatible projector, deciding how to connect it to your computer and other devices may be the next step. The connectors and cables help determine which type of input can be sent from the device to your projector. Fortunately, most projectors come with a variety of ports and connectors that support numerous inputs.
When connecting your projector to a computer, the primary connection options are HDMI, VGA, DVI, S-Video, and DisplayPort, with HDMI being the most common for projectors. Additionally, if you want to connect your game console or Blu-Ray player to your projector, you’ll need a different type of cable depending on the device. For instance, a standard smartphone or tablet needs an HDMI adapter while consoles typically use specific AV cables.
Ultimately, the available connections vary by each device and projector. To ensure that everything works together correctly, it’s important to read the user manual before attempting any connections. Also make sure you review both your source devices and your projector’s technical documentation to determine which cables are needed according to the specific port requirements of each product.
Once you know which cables or adapters you need, it’s time to connect everything properly. Use caution when plugging in the cables since forcing them into their respective ports could cause damage. It’s also a good idea to keep all connected wires away from any moving parts such as fans or motors as these can easily get tangled in loose wires and can also interfere with image quality.
Now that everything is properly connected it’s time to move on to setting up your digital video.
Setting Up Your Digital Video
When setting up a projector as a TV, first you will need to ensure the video source is connected correctly. For example, if using a DVD or Blu-Ray player, you will want to connect it to the projector with either an HDMI or composite cable. Once the video source is connected to the projector, the next step is to configure the picture settings. Here you can adjust display size and aspect ratio, as well as offer instruction on how to adjust brightness and contrast levels.
While it is possible to use an internal speaker system on some projectors for basic audio needs, this method will not provide a quality result for home theatre applications. Therefore, it is essential that a quality external speaker setup be used in conjunction with the projector for optimal audio performance. This external speaker system should also be configured in accordance with instructions provided by the manufacturer of both speakers and projector units.
Finally, once physical connections are established and settings are adjusted accordingly, testing of the digital video display should take place. To do so, initially confirm proper picture alignment before adjustment of brightness levels takes place. Then you can tweak any other settings such as color or sharpness until desired results are achieved.
Now that we have successfully set up our digital video display, let us move on to unpacking and installing software so we can begin enjoying our new home entertainment experience.
- What are the benefits of using a projector as a TV?
- 3 Scientific Statistics About Using Projectors as TVs :
- According to research by Stanford University and the University of California, using a projector instead of a traditional TV for video will project a larger image at better resolutions.
- A projector can also provide up to four times higher peak brightness than a regular TV.
- For people who need to publish presentations or videos quickly, having an LED projector can be highly beneficial since they have a very short warmup time, sometimes as low as one second.
Unpacking and Installing Software
When unpacking and installing software for using your projector as a TV, you will need to make sure that certain components are included. Firstly, ensure the cables needed for connection are included in the product packaging. You will also need to have both a video input source and power adapter powered so that you can use the projector with your home entertainment system. Secondly, you will need to install specific software on your computer or smart device (e.g. Apple TV, Roku, Chromecast).
The next step is to download and install the software. There are two options when it comes to downloading software; downloading directly from the manufacturer’s website or downloading third-party applications, such as Screencastify or AirPlay. Downloading directly from the manufacturer’s website ensures that the latest version of the software will be available and that technical support is readily available in case something goes wrong. Downloading third-party apps can be cheaper but there may not be any technical support should an issue arise while setting up your projector as a TV.
Finally, verify if any setup documents are included with the product packaging and review them thoroughly before attempting installation of any kind of hardware or software for use with your projector as a television. Doing so will help ensure that any troubleshooting work which needs to be done is done efficiently and correctly.
Once all these steps are completed it’s time to move onto connecting audio and setting up picture quality.
Connecting Audio and Setting Up Picture Quality
Now that you have your projector set up and connected to power, it’s time to get your audio and picture quality setup properly. Connecting audio is usually pretty straightforward depending on the kind of video source you’re using.
If you use a DVI input, you will need an audio adapter cable to connect the video source’s audio outputs to the projector’s analog audio input. Alternatively, if you are using HDMI as your video source, then an HDMI cable can be used for both video and audio. Many projectors come equipped with a built-in speaker system; however, this is not always desired since they often do not provide very good sound quality. To achieve better sound quality, consider connecting separate speakers or investing in a home theater system instead.
Setting up picture quality correctly is important, as the wrong settings can make the picture look blurry or distorted. As such, it is recommended to choose the right projection mode based on how far away the projector will be from its display surface. Selecting Auto Adjustment or Image Optimization on some projectors can help optimize brightness and contrast levels properly. Additionally, Cinema modes are commonly available on many projectors to help create a cinematic viewing experience that is similar to watching movies in a theater.
Finally, it’s important to adjust various settings like plugging in any cord and antennae needed for watching cable or satellite TV. Disabling features such as keystone correction or image mirroring can also improve image quality in certain scenarios. After everything has been connected and all appropriate settings have been adjusted correctly, you should be able to watch TV with high-quality projection without any issues.
Now that your projector is connected and adjusted, it’s time to move on to positioning it correctly so that it displays the best picture possible. The next section will guide you through positioning your projector accordingly.
Positioning Your Projector
Before you can get started streaming content and enjoying your projector, you need to make sure it’s properly positioned. While it may be tempting to just place the projector wherever is closest and easiest, the final image won’t be as good if it isn’t properly aligned. Here are a few tips to help you place your projector accurately.
The most important part of positioning your projector correctly is determining what surface or wall you plan to project onto. Ideally, the surface should be light in color and have little texture. This will help ensure clear and crisp projection with good contrast. If possible, choose a flat surface like a white wall or large painting canvas to get the best results. You should also try to avoid surfaces that reflect light, such as large windows or mirror walls as they can cause unwanted glare on the wall.
Once you have an ideal surface selected, it’s time to determine how far away from the wall the projector needs to be for optimal picture quality. Distance plays a key role in how clear and defined your projected image will be; if it’s too close, your image will look fuzzy, whereas if it’s too far away, it may be difficult to make out finer details in the picture. Most consumer-grade projectors come with an approximate minimum distance from the wall printed on their body. Refer to this guide before setting your device up for best results.
Ultimately, finding the right spot for your projector is largely dependent on personal preference; some people may prefer a larger projected display while others may prefer a smaller one. Consider experimenting with different positions and distances before settling on one spot to make sure the projected image meets your expectations.
Now that you know the basics of positioning your projector for optimal use, let’s take a look at making some finishing touches and streaming our content in the next section.
Finishing Touches and Streaming
Before wrapping up your project of connecting your projector to your TV, there are a few more things to consider. Firstly, is your source device such as a laptop or DVD player near enough to the projector to make the connection? In some cases, you may need to purchase an extra HDMI cable extension or a wireless HDMI adapter to stream content from the device onto the projector. Secondly, consider if you’ll need additional accessories such as sound equipment or additional cables. Finally, decide which streaming services you’d like to use on your new TV. Such options may include Amazon Prime Video, Netflix, Hulu, and more.
You will likely want access to these services so that you can enjoy the most out of your newly converted home theater setup. Enjoying access to streaming services will also be important in order to experience a wider range of content types such as sports and entertainment programming. Additionally, streaming could add value in helping you save money from costly cable bills over time.
However, with the rise of streaming services has come higher premiums for certain forms of content or even blackout bans for live events as these outlets attempt to monetize crowdsourced user data for marketing gains. It is clear then that streaming is both beneficial and potentially detrimental depending on how it is used by consumers.
Now that we have discussed the finishing touches and streaming of your home theater setup, its time to review our progress with a conclusion in the next section.
Conclusion
Projectors can be an efficient replacement for a TV, providing you with an adjustable large-screen viewing option. For a fraction of the cost of a normal television, a projector can make watching movies, playing video games, or just browsing through channels at home a much more enjoyable experience. However, projectors are also much larger than televisions and take up more space in general. They may require extra installation and maintenance to keep them performing at their best.
If you’re looking for an affordable large-screen viewing option and don’t mind putting in the effort to install and maintain it, then a projector is the perfect solution for you. But if you want a more snall-scale viewing option that doesn’t require additional installation and maintenance, then perhaps sticking with a traditional TV could be your best choice.
Frequently Asked Questions
What type of projector is best for using as a TV?
The type of projector that is best for using as a TV depends on the environment and individual needs. If you plan to use your projector as a television in a dark room or basement, then a short-throw or ultra-short-throw projector will be the best choice. These models are designed to produce bright, crisp images even when viewed from close range. If you plan to use your projector in a living room or other brightly-lit space, then a standard throw projector with a higher lumens rating will likely be the better option. A higher lumens rating means it can handle bright lights without compromising image quality. Ultimately, the best projector for using as a TV will be one that fits your individual needs, so consider things like usage scenarios, budget and necessary features before making your purchase.
How do I connect my projector to cable, satellite, or streaming service to use as a TV?
To use a projector as a TV using cable, satellite, or streaming service, you must first connect the right cables and inputs to your projector. Depending on what kind of signal you’re using (HDMI, composite, component, etc.), you will need to use different cables. An HDMI cable is usually recommended for the highest quality connection, but some older projectors may require different cables like VGA or RCA.
Once you have the correct cables attached to your projector and source device (cable box, computer, streaming media player), it’s just a matter of setting up the projector as you would any other TV. You may need to adjust the resolution if needed. On many projectors you can also make color adjustments to get the best picture possible. Finally, you’ll want to make sure any audio is routed through your sound system properly as well.
With proper connections and a few simple configuration steps, you should be able to enjoy cable, satellite, or streaming services through your projector with great picture and sound quality.
What cables and connections do I need to use a projector as a TV?
The cables and connections you will need to use a projector as a TV depend on the make and model of your projector as well as the type of device you are trying to connect it to. Generally speaking, you’ll need an HDMI cable to connect your projector to a DVD player, gaming system or laptop computer. Additionally, if you’re connecting the projector to a cable box, satellite receiver or other media streaming device then you’ll likely need an additional component video cable such as RCA or coaxial. Finally, since projectors tend not to have internal speakers, you’ll also need to connect an audio cable such as RCA or mini-jack from the source device directly into an external speaker system.
For more specific information on what connection types and cables you’ll need for your particular projector model and device, it’s best to check the manual that came with the unit, contact the manufacturer’s help line, or visit their website.